Codex CLI
A command-line AI coding assistant with sandboxing and patch-based editing.
About the Project
Codex CLI is a coding agent from OpenAI that runs locally on your computer.
- Official site: https://chatgpt.com/codex
- Project page: https://github.com/openai/codex
Demo
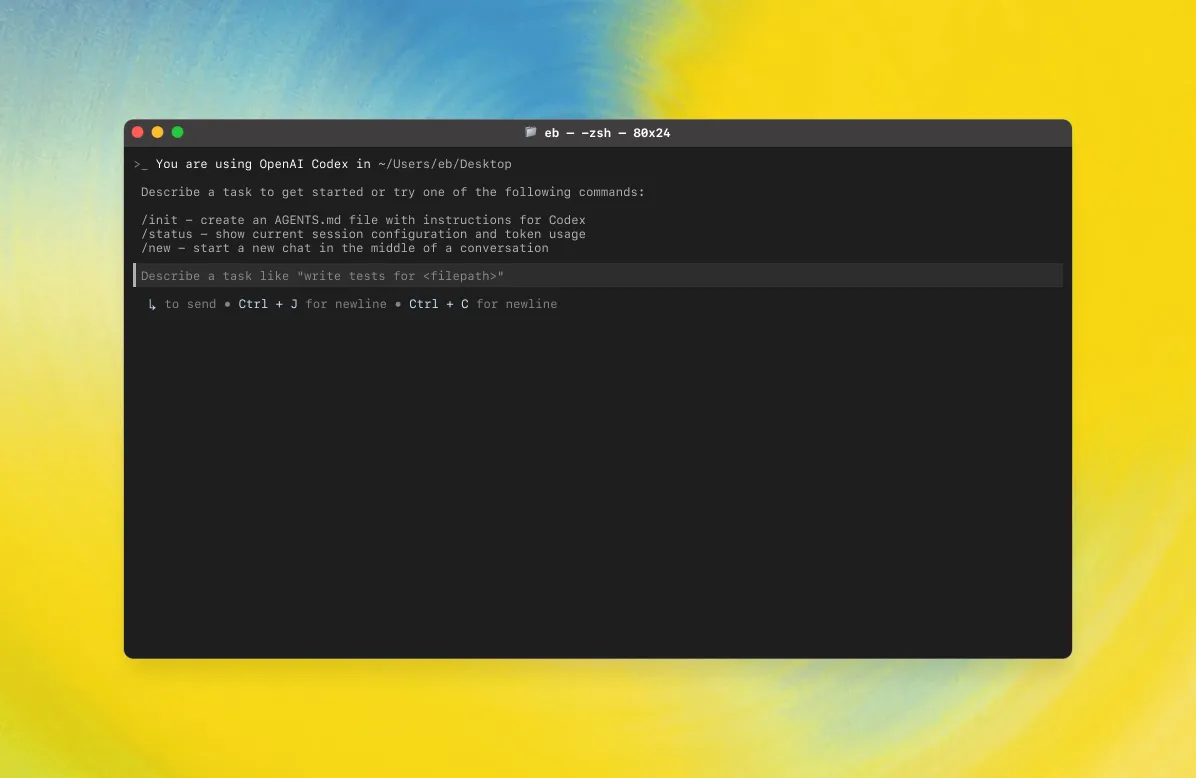
Features
| Category | Feature |
|---|---|
| Terminal-based coding assistant | Codex CLI is an interactive, terminal-based coding assistant for editing code, generating patches, and running commands from the command line. |
| Tool-driven architecture | Provides tools such as apply_patch, shell, update_plan, and multi_tool_use for controlled modifications to repository files and operations. |
| Atomic patch editing | Uses a dedicated patch format to atomically add/update/delete files via apply_patch, making changes easy to audit and roll back. |
| Sandbox and approvals | Supports sandbox policies (such as workspace-write and read-only) and approval modes (on-request, on-failure, never) to control write and network access. |
| Plan tracking | update_plan lists steps and tracks their status, requiring exactly one in_progress step at all times to keep progress clear. |
| Interaction conventions | Sends a short preamble before important operations, keeping the tone friendly and concise while providing progress updates. |
| Safety constraints | Follows strict rules (no arbitrary changes to unrelated files, no copyright headers, no destructive commands) and requires user approval for sensitive operations. |
| Testing and formatting | Recommends running relevant tests and formatters after changes, but does not fix issues unrelated to the current task. |
| Output and style | Final output follows CLI rendering conventions (e.g., ** headings, backticks for paths/commands), keeping a scannable, concise structure. |
| Parallel execution | Supports running multiple tools in parallel via multi_tool_use.parallel to improve efficiency. |
How to Configure the AI Model
Windows: Step-by-Step Guide
1. Open the terminal (Windows PowerShell)
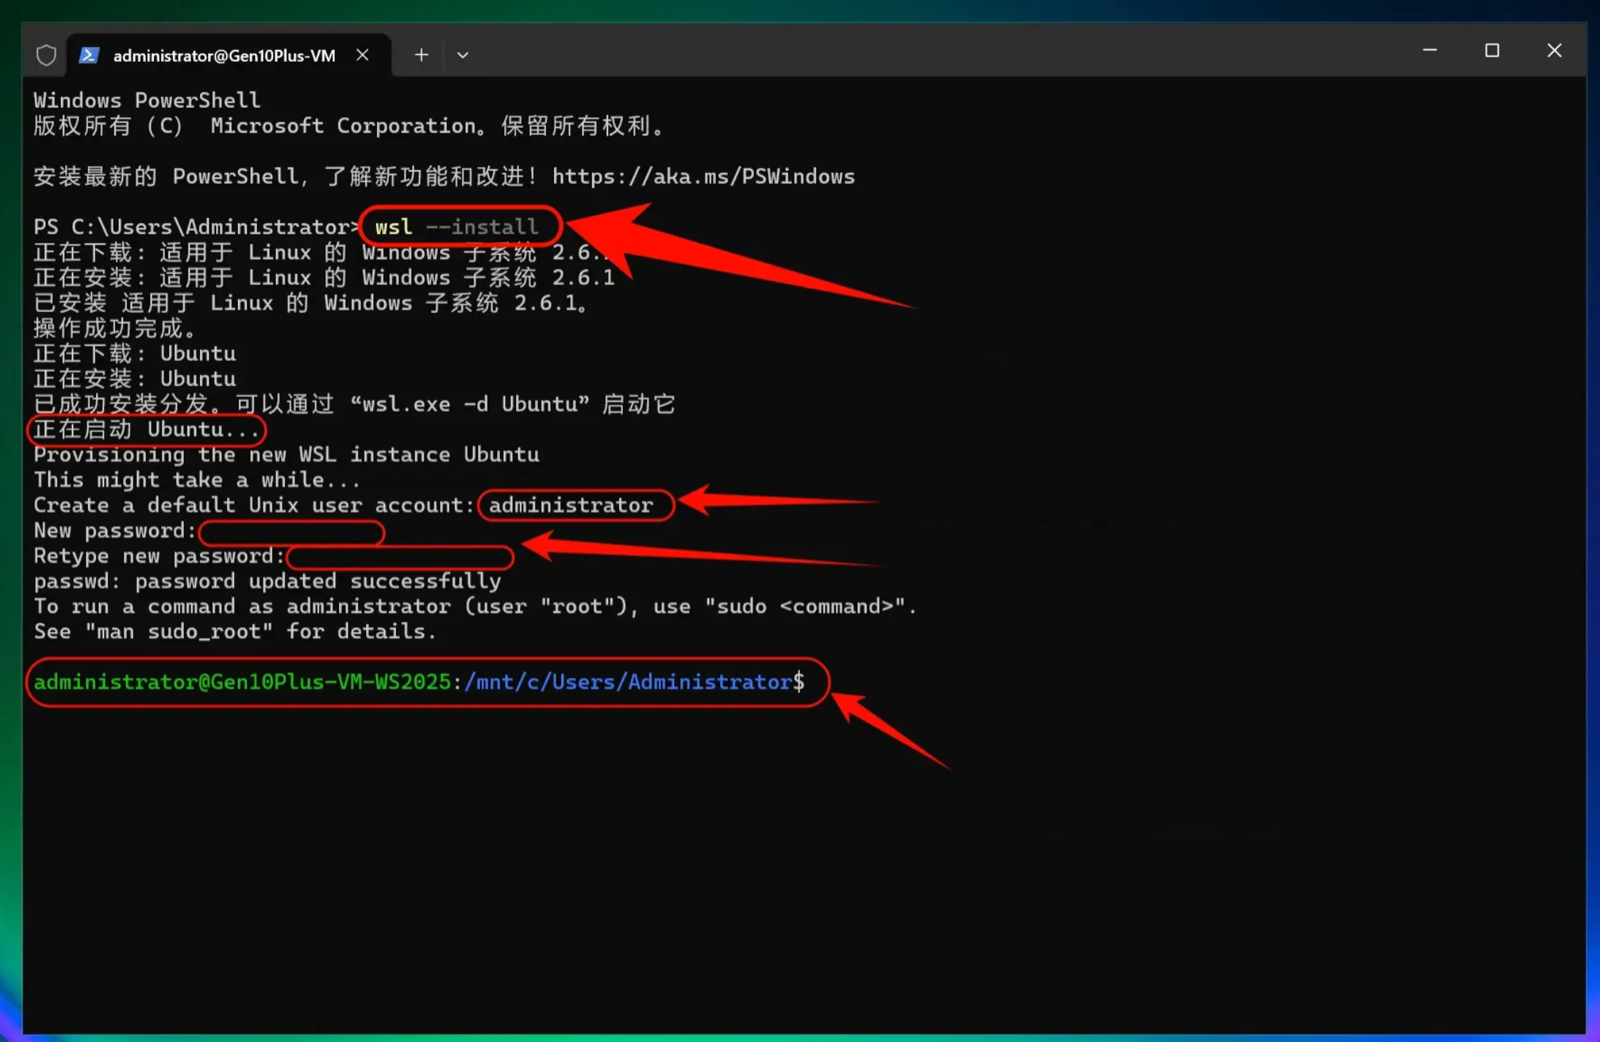
2. Install WSL
For the best performance on Windows, install and use the Windows Subsystem for Linux (WSL2).
Install WSL2 and restart your Windows computer
wsl --installAfter installation completes, restart your Windows computer.
Windows notes
- PowerShell is recommended over CMD
- If you run into permission issues, try running as administrator
- Some antivirus software may produce false positives; add it to the allowlist if needed
Download Node Version Manager (NVM)
curl -o- https://raw.githubusercontent.com/nvm-sh/nvm/master/install.sh | bashInstall Node.js 22 with NVM
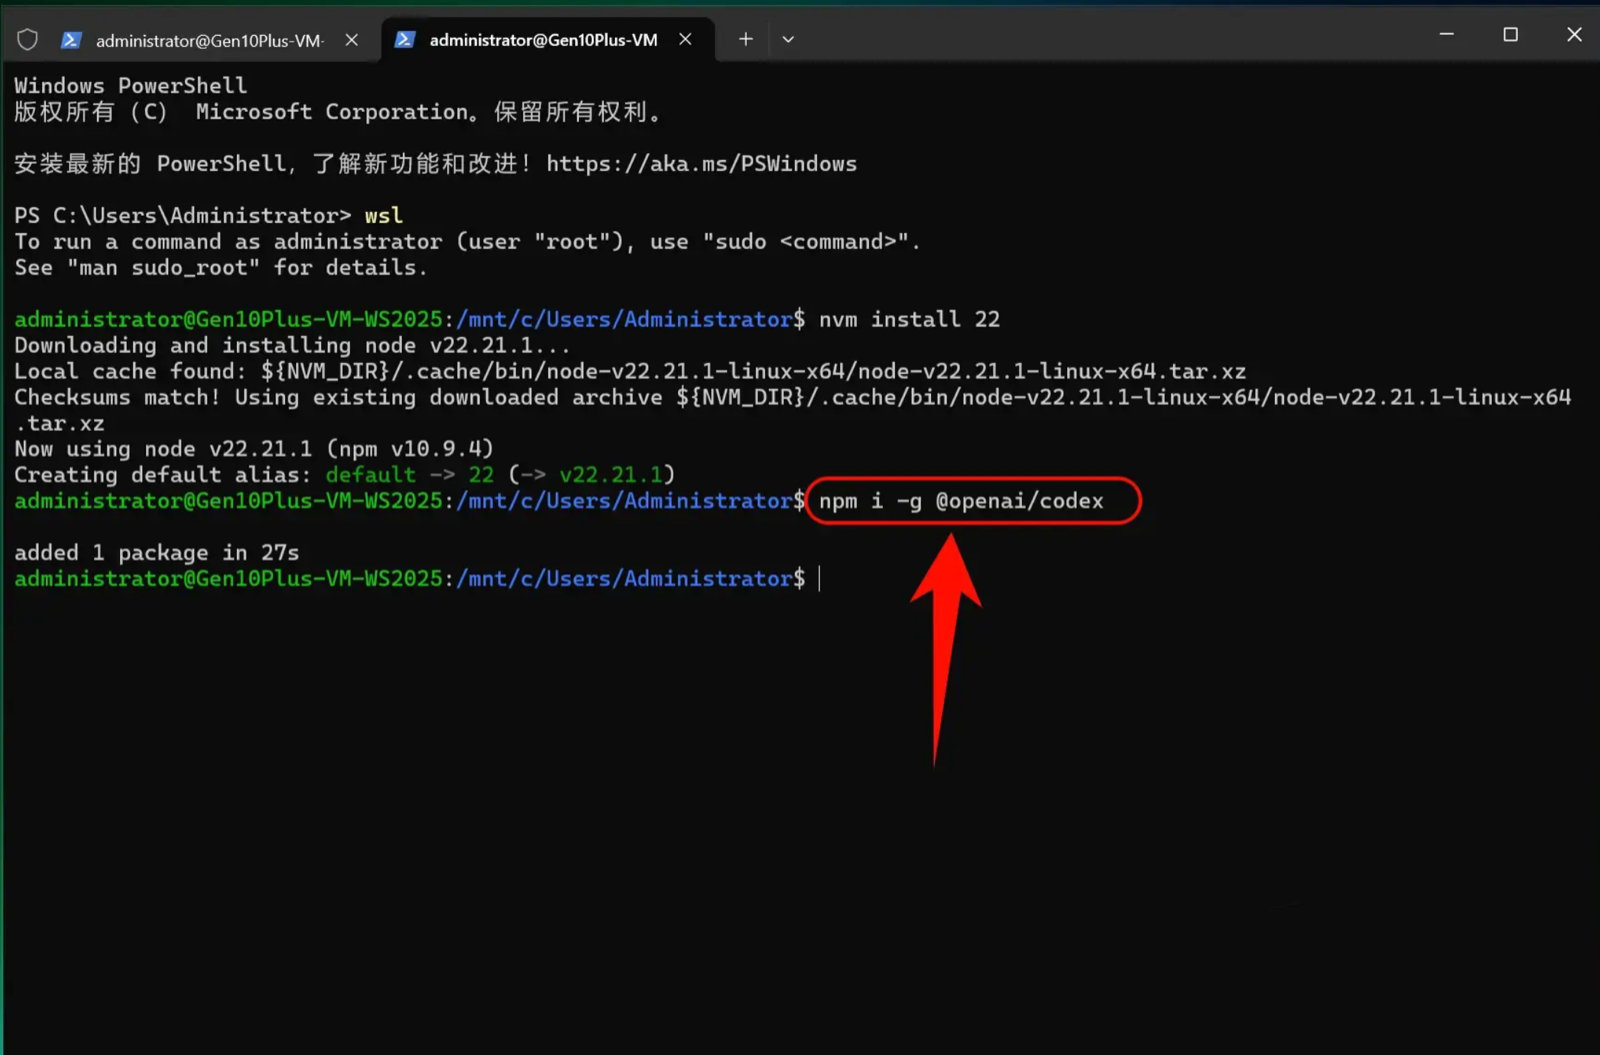
Open a new PowerShell tab and start WSL:
wslInstall Node.js (the version number may change over time; install the version required by the OpenAI website):
nvm install 223. Install Codex CLI
Install Codex CLI
npm i -g @openai/codexThis command downloads and installs the latest version of Codex CLI from the official npm registry.
4. Modify the configuration file
One-click modification of the Codex CLI configuration file
curl -fsSL https://your-domain/cli/install.sh | sh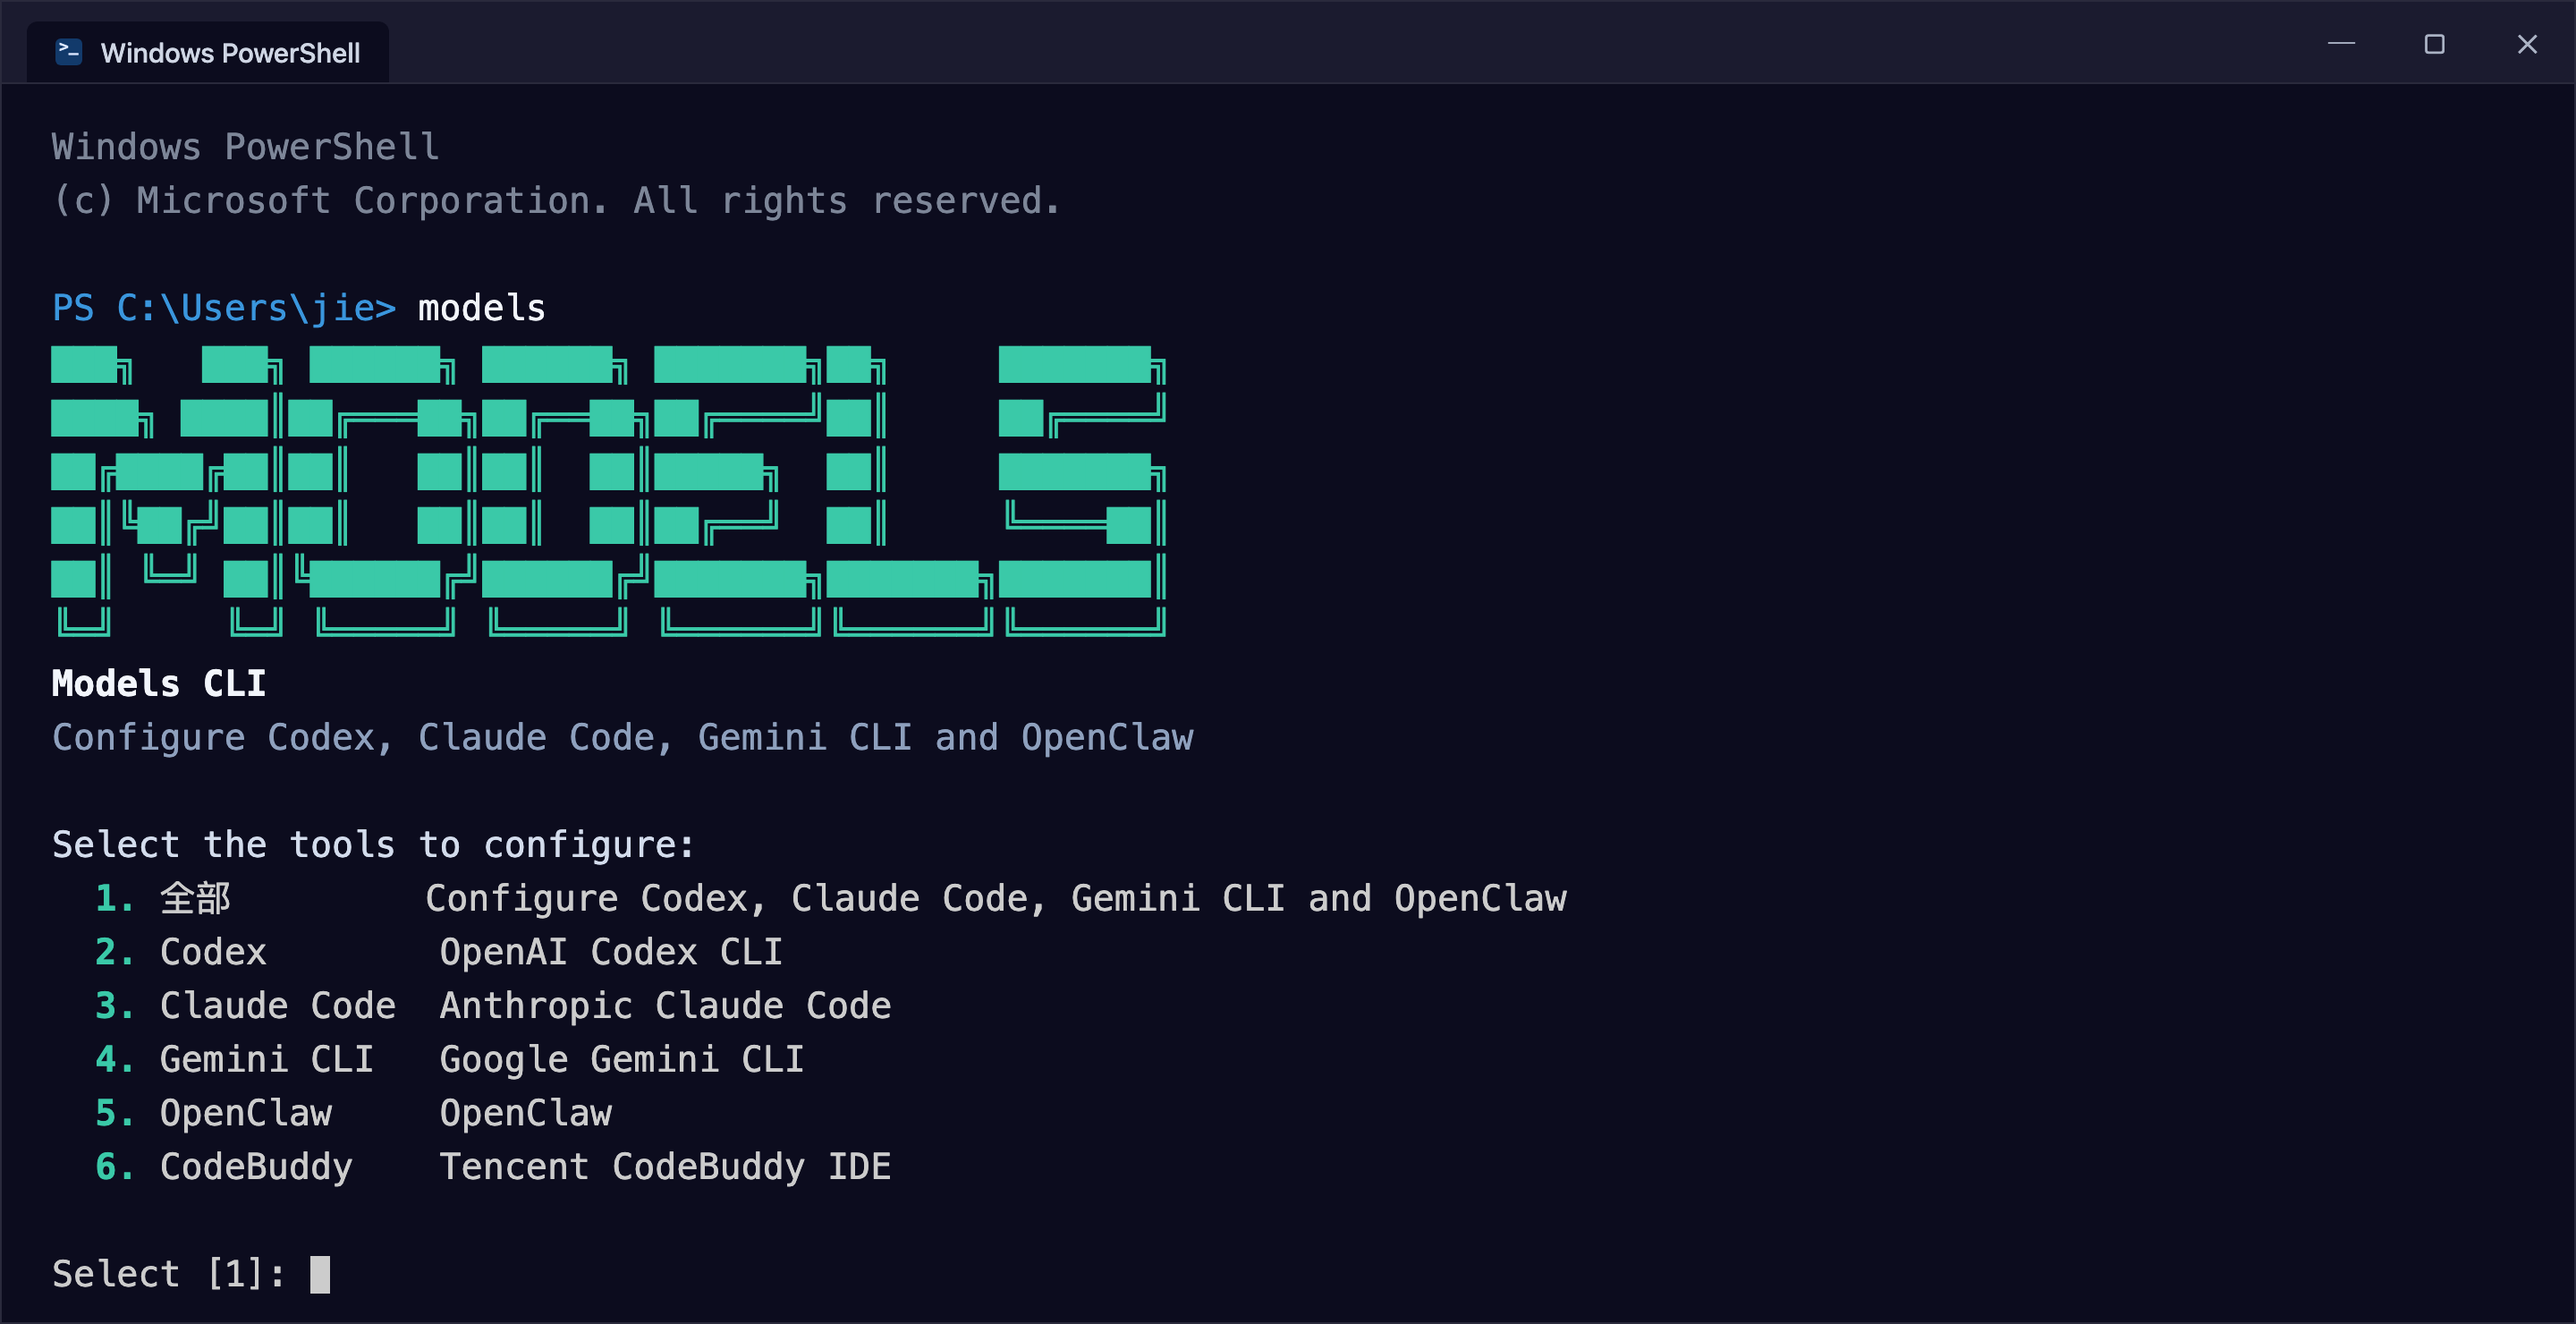
5. Start using Codex CLI
Now you can start using Codex CLI!
Launch Codex CLI
Start WSL2:
wslLaunch Codex CLI directly:
codexUse it within a specific project:
cd mnt/c/path/to/your/project
codex
Press Enter to launch Codex CLI.
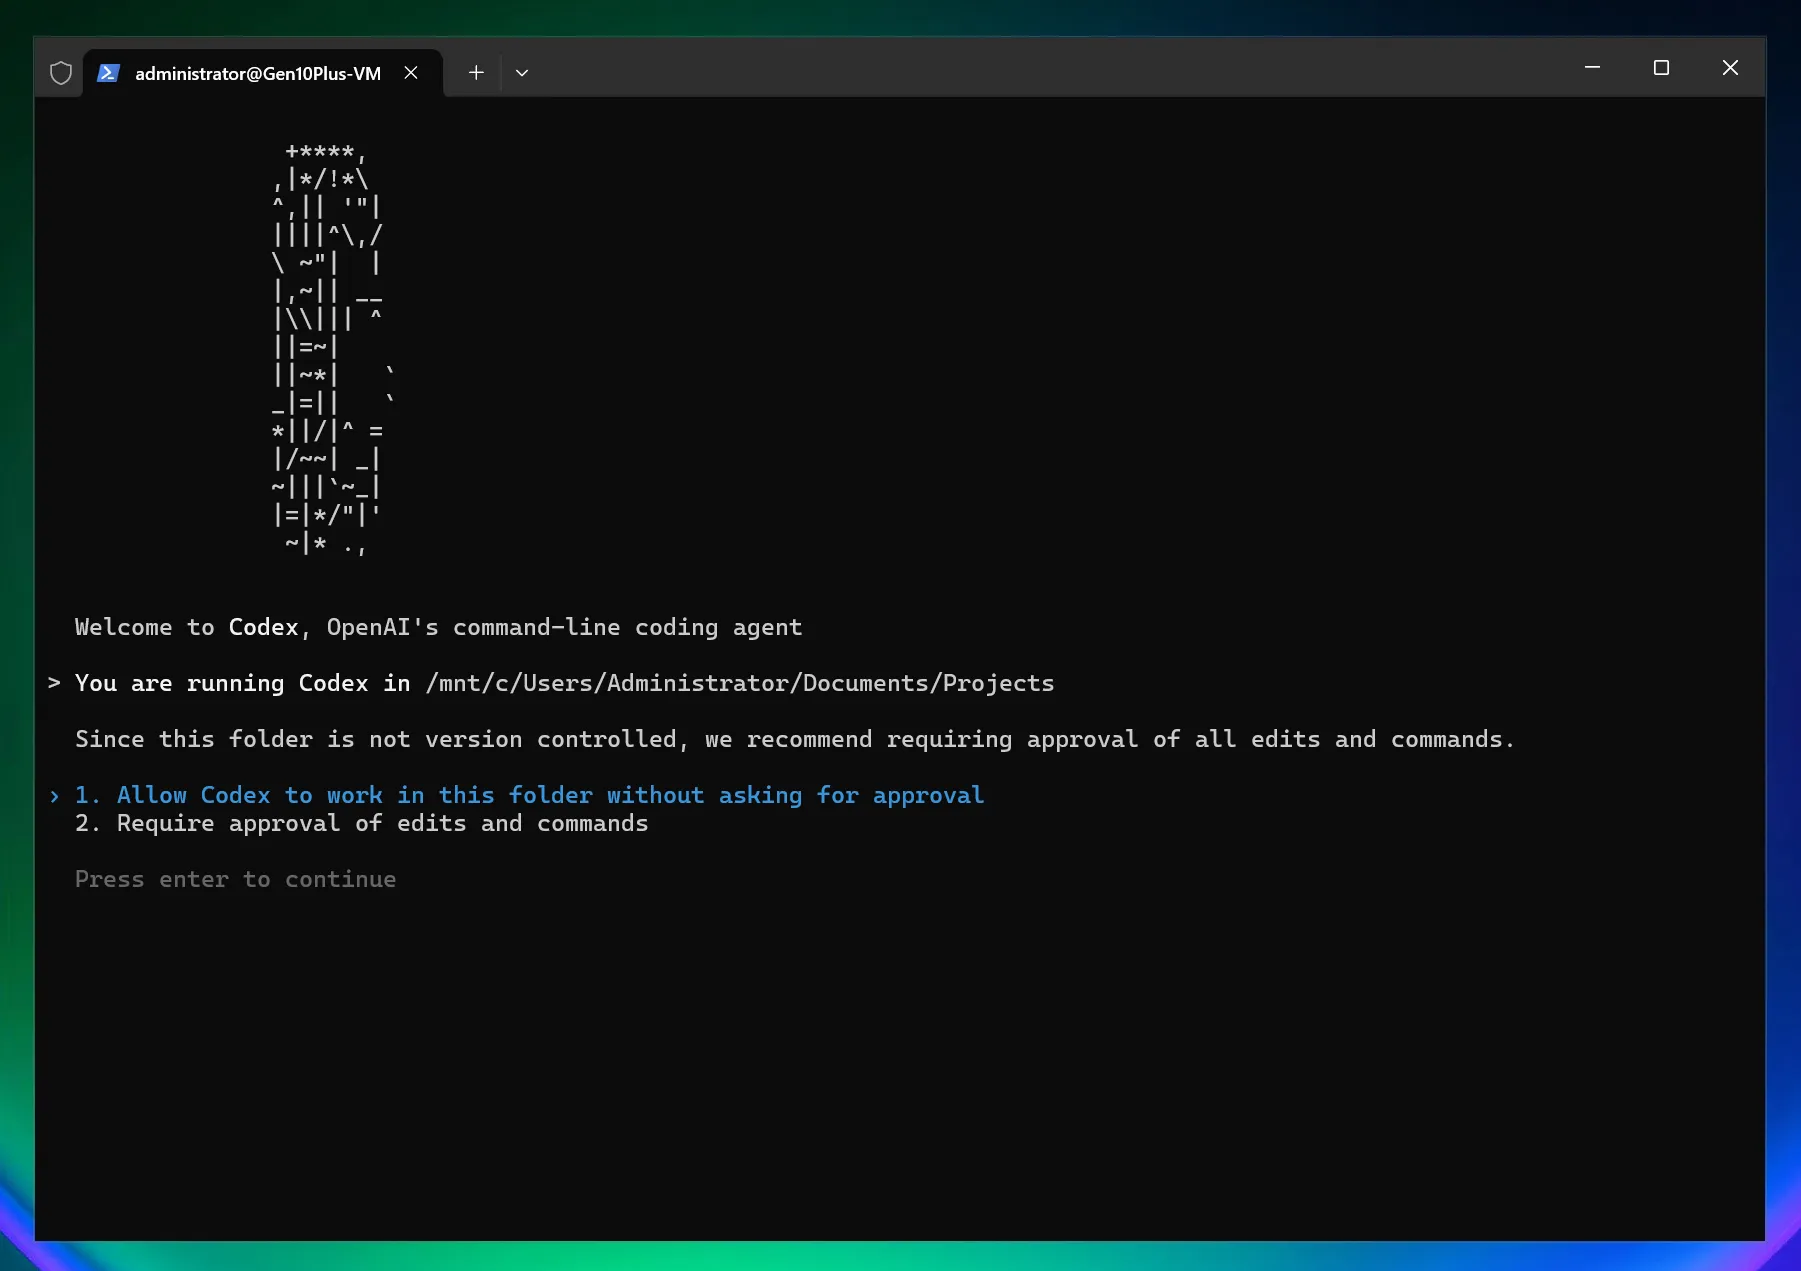
Set Codex CLI permissions: 1. Allow Codex to edit files directly; 2. Require manual authorization for Codex to edit files
Select a model
/model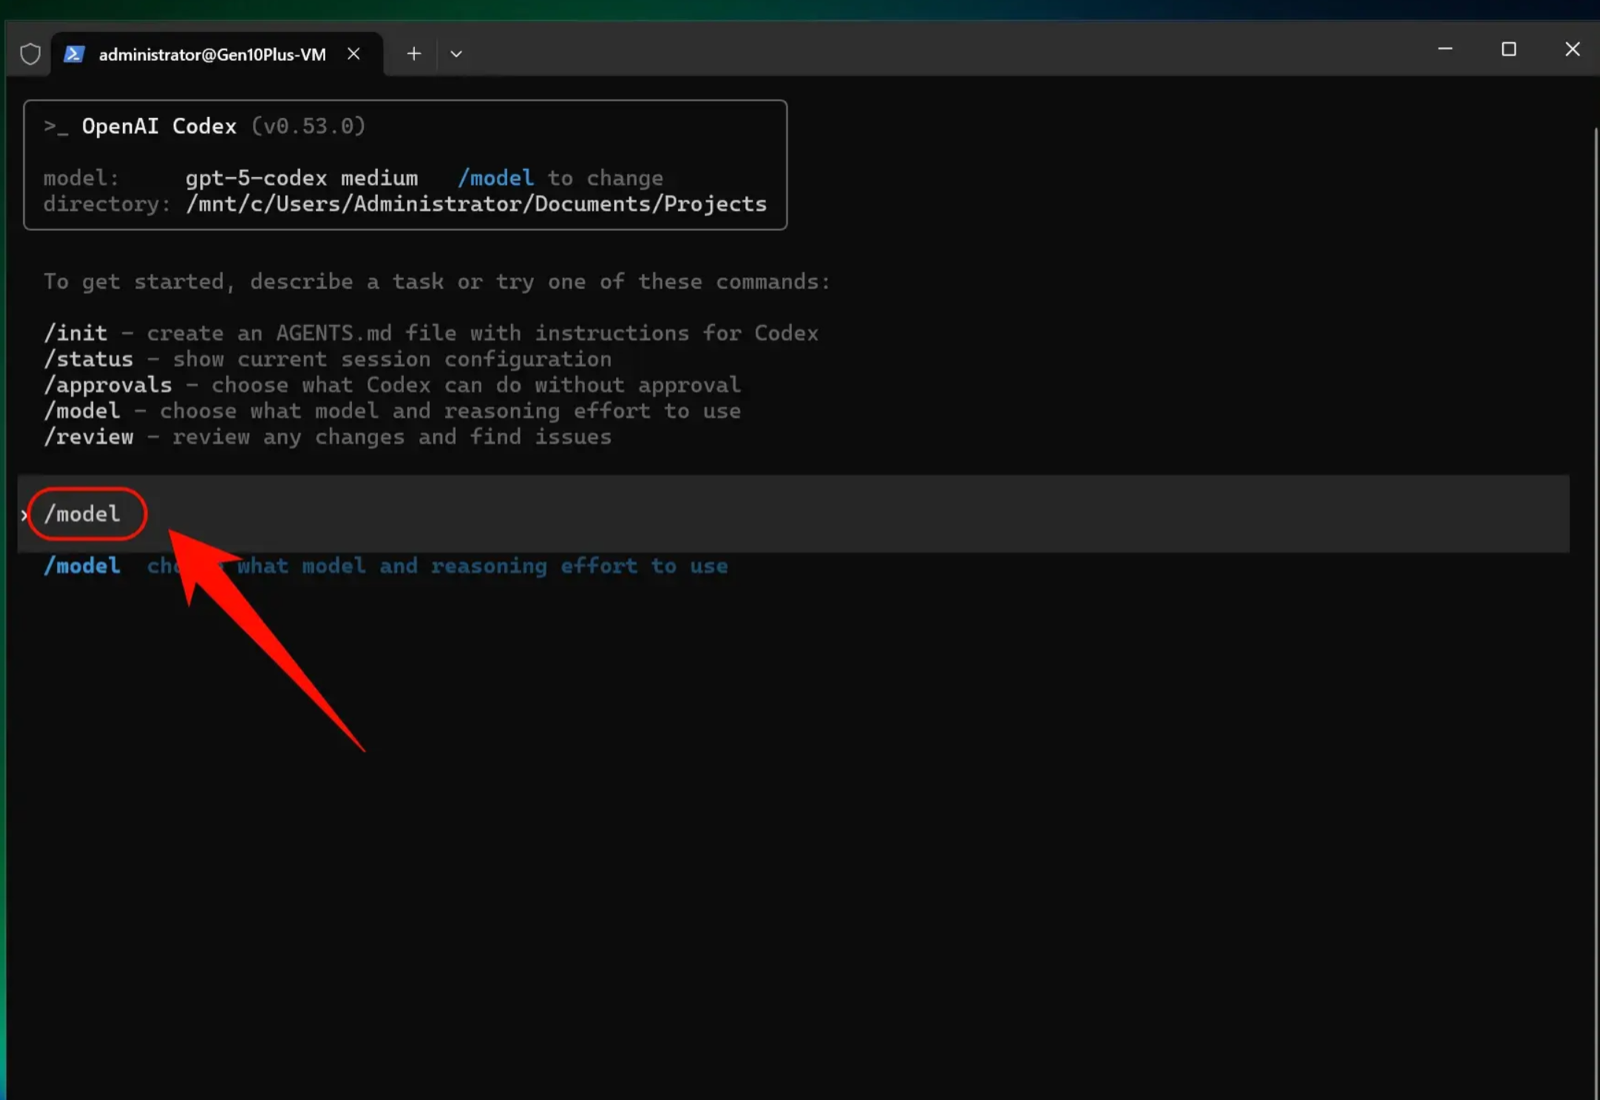
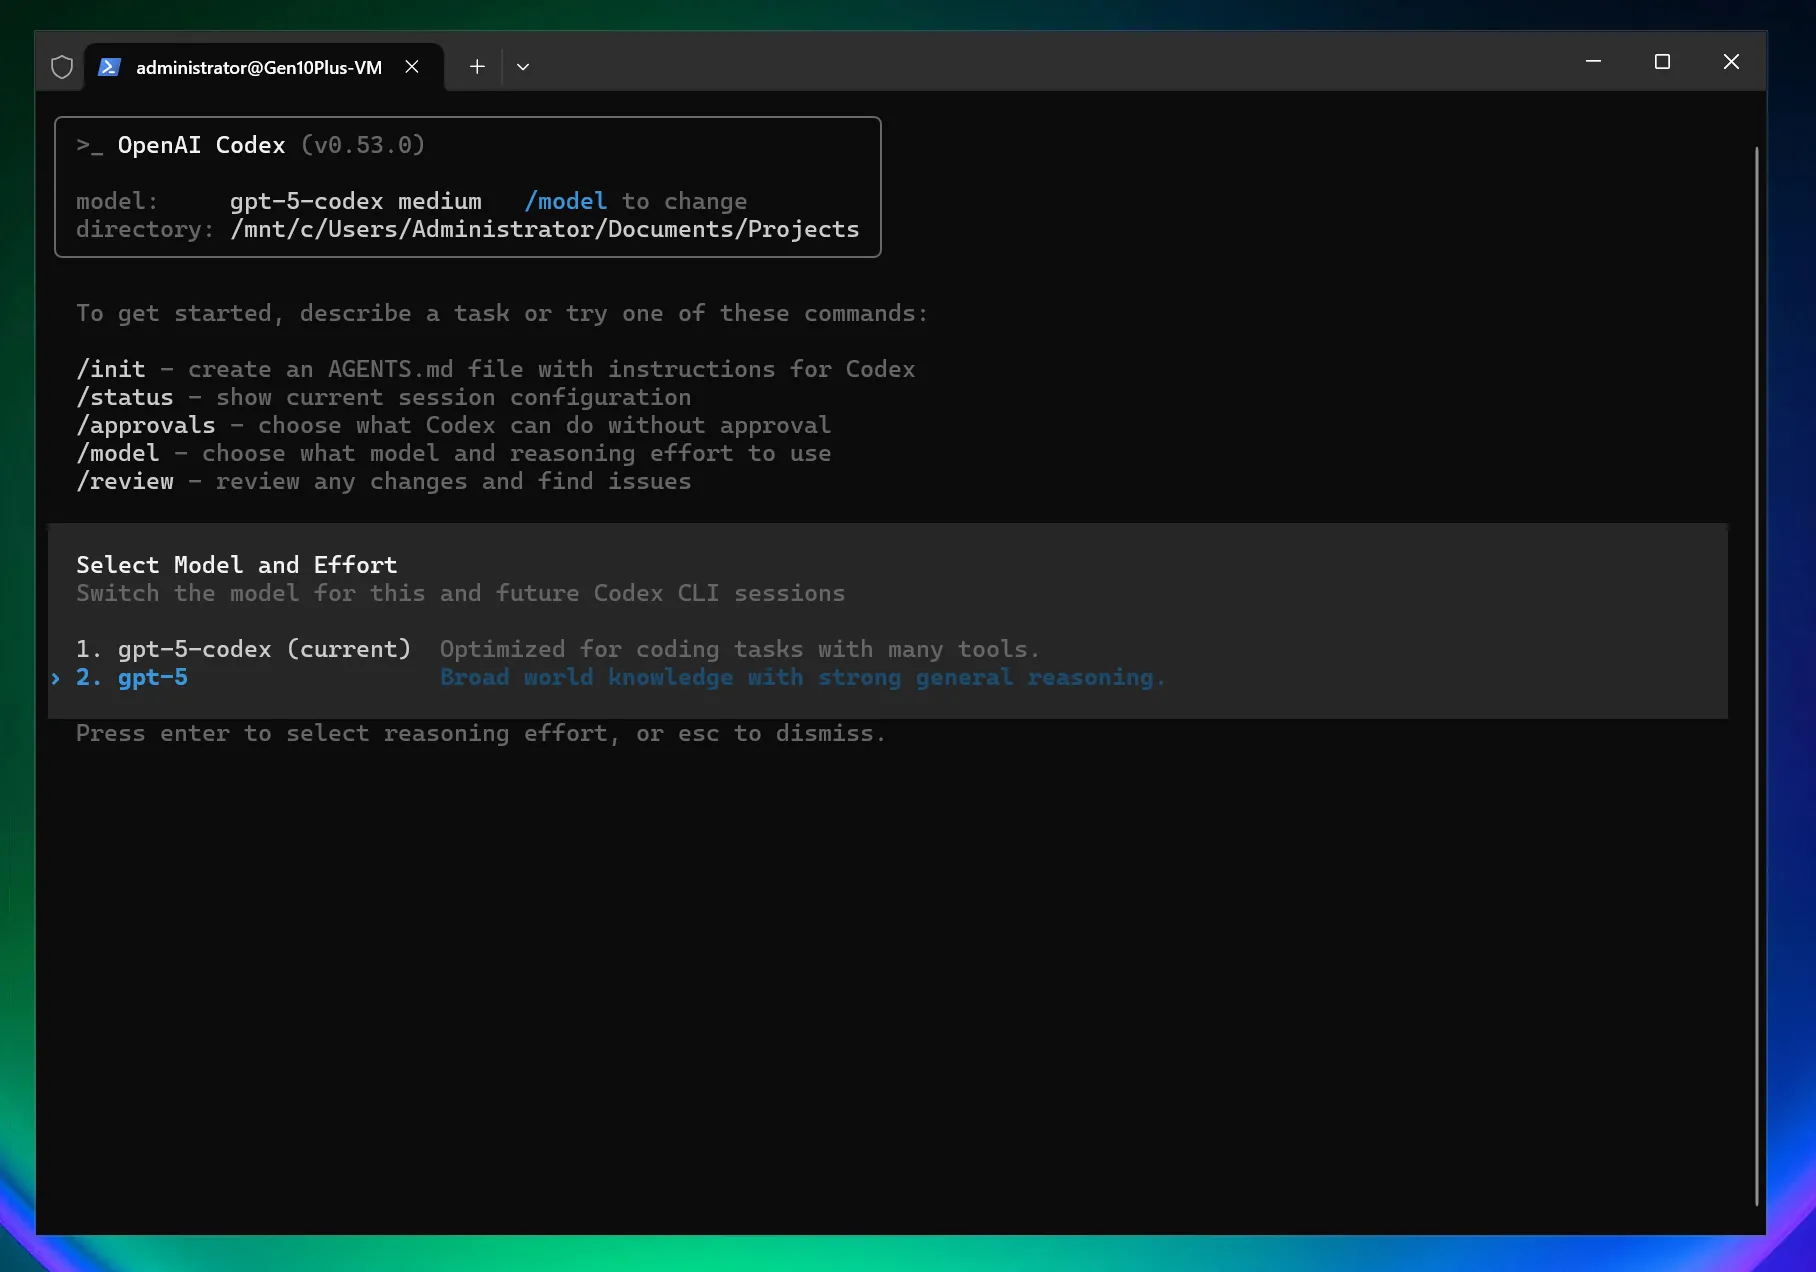
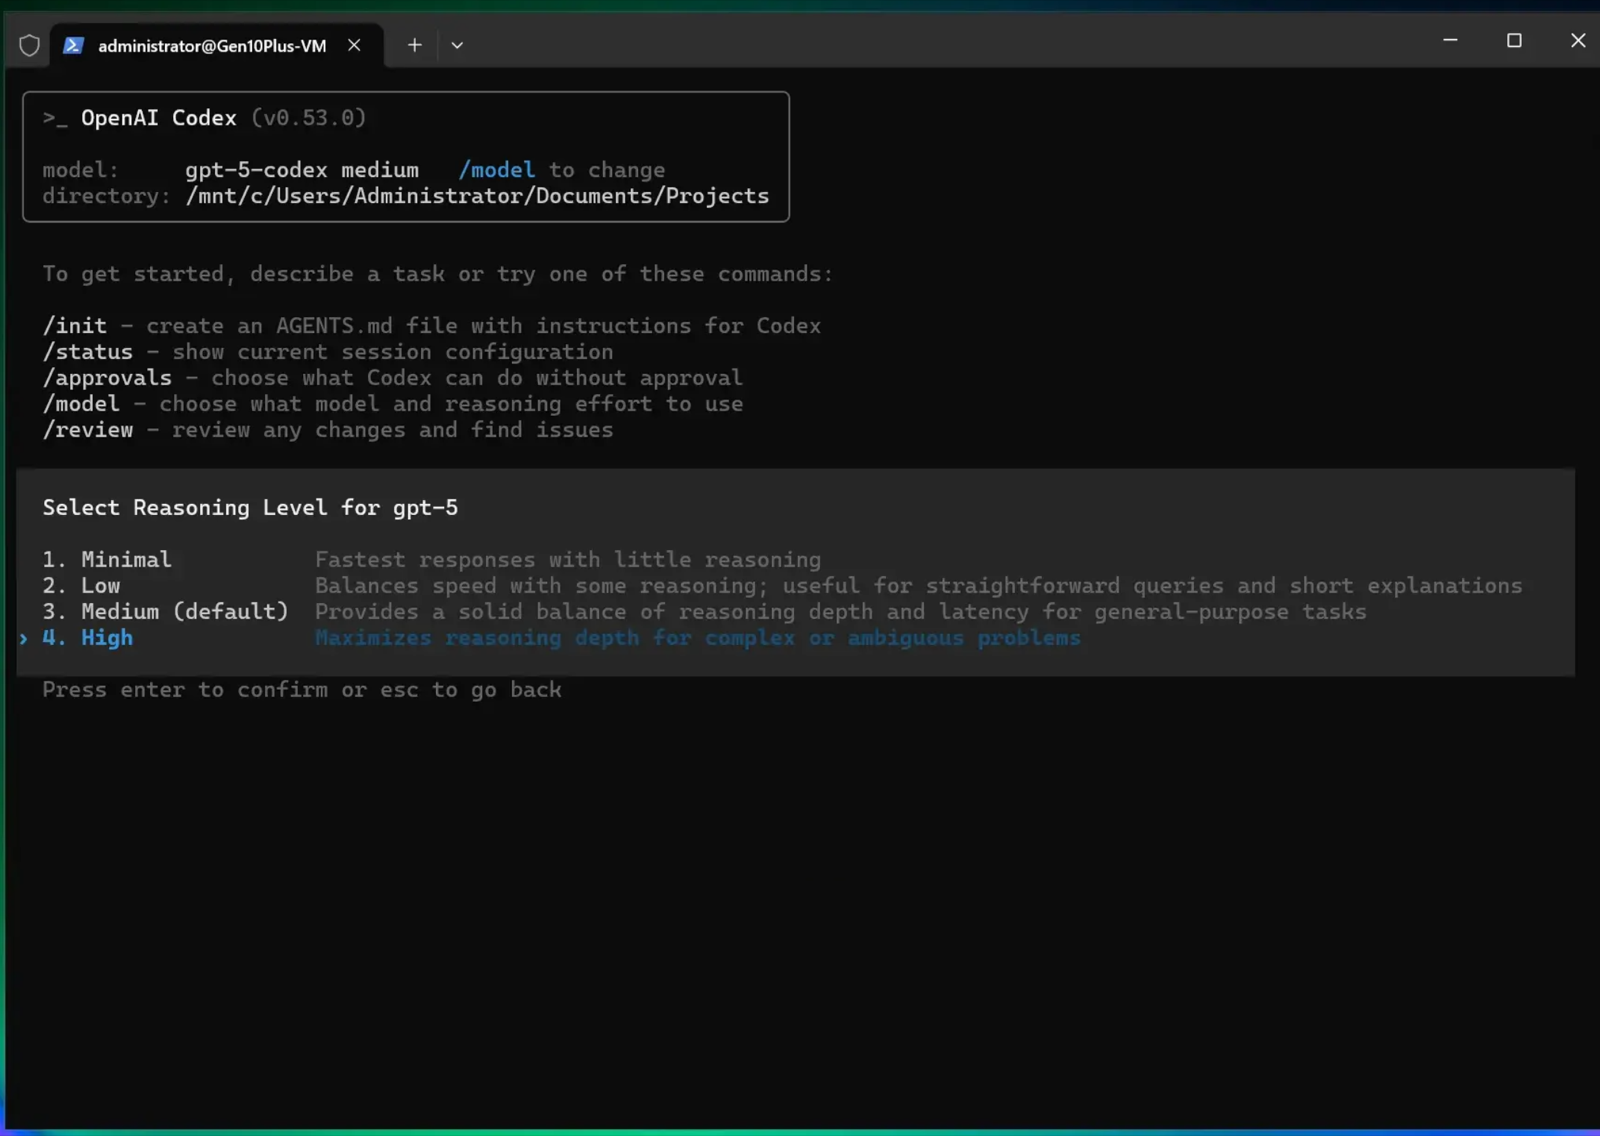
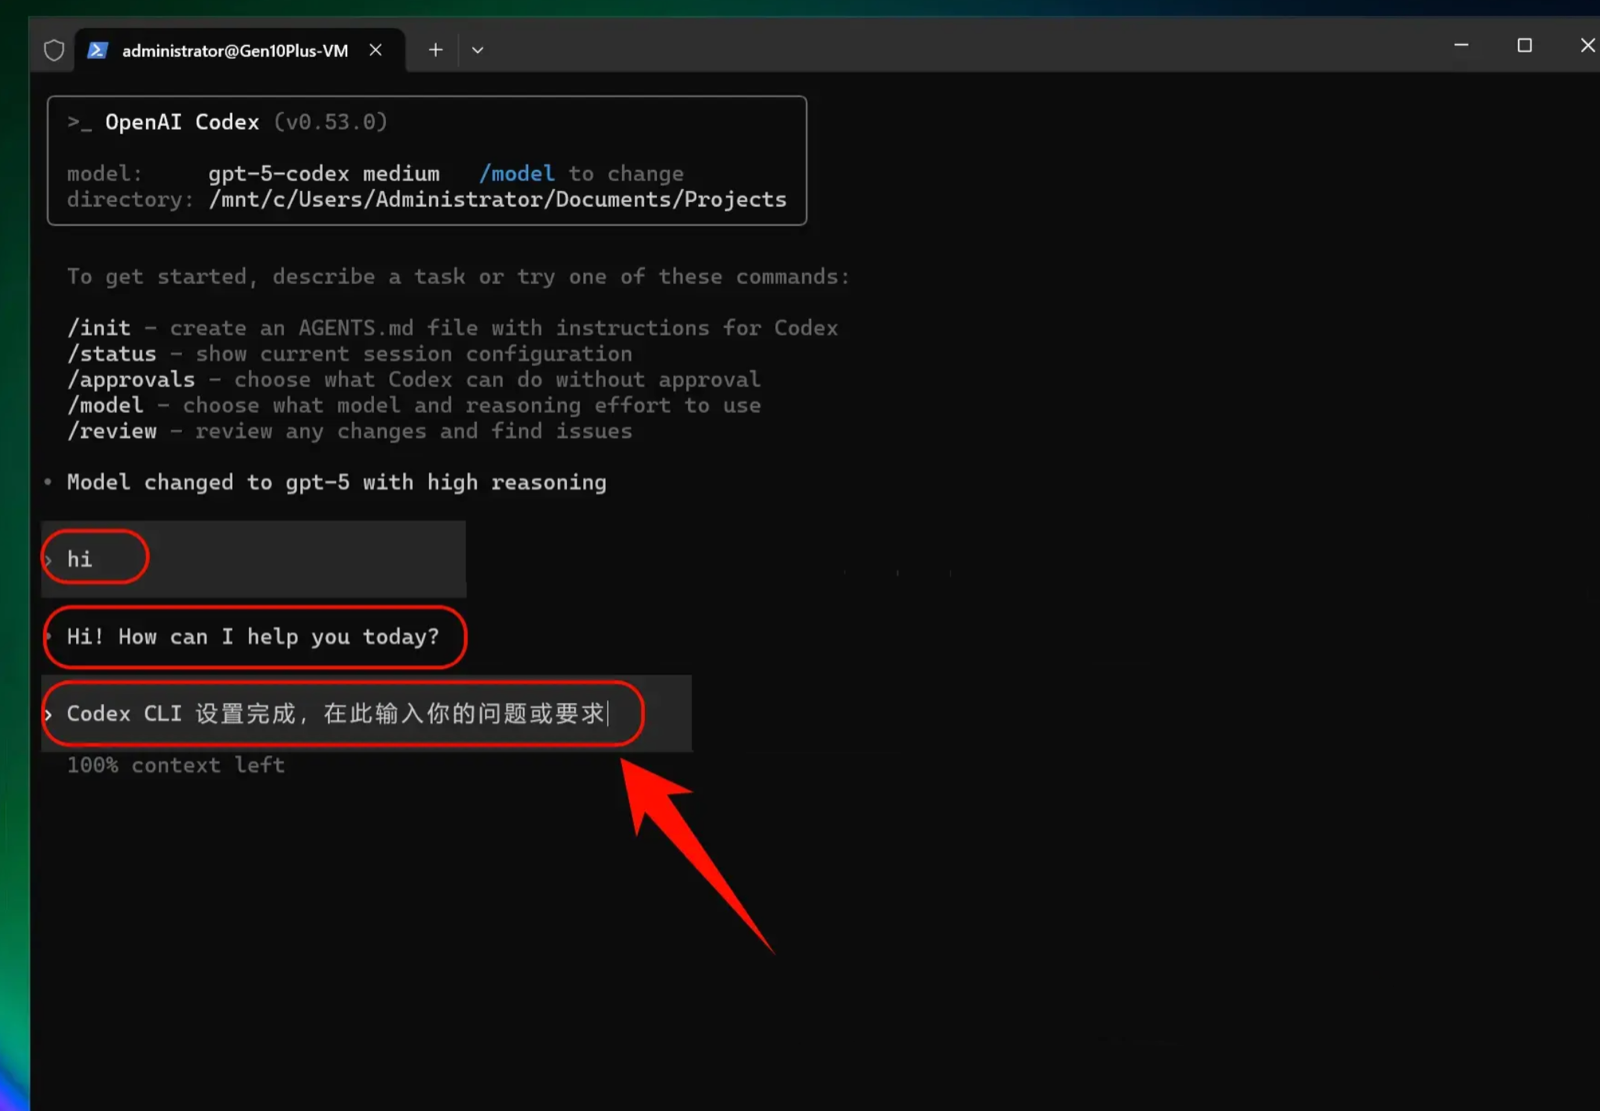
Note: After changing the API endpoint, all models (including the official preset models) will call your custom endpoint instead of using your official account quota.
macOS: Step-by-Step Guide
1. Install Homebrew (skip if already installed)
Homebrew is the package manager for macOS that's otherwise missing.
Official site: https://brew.sh
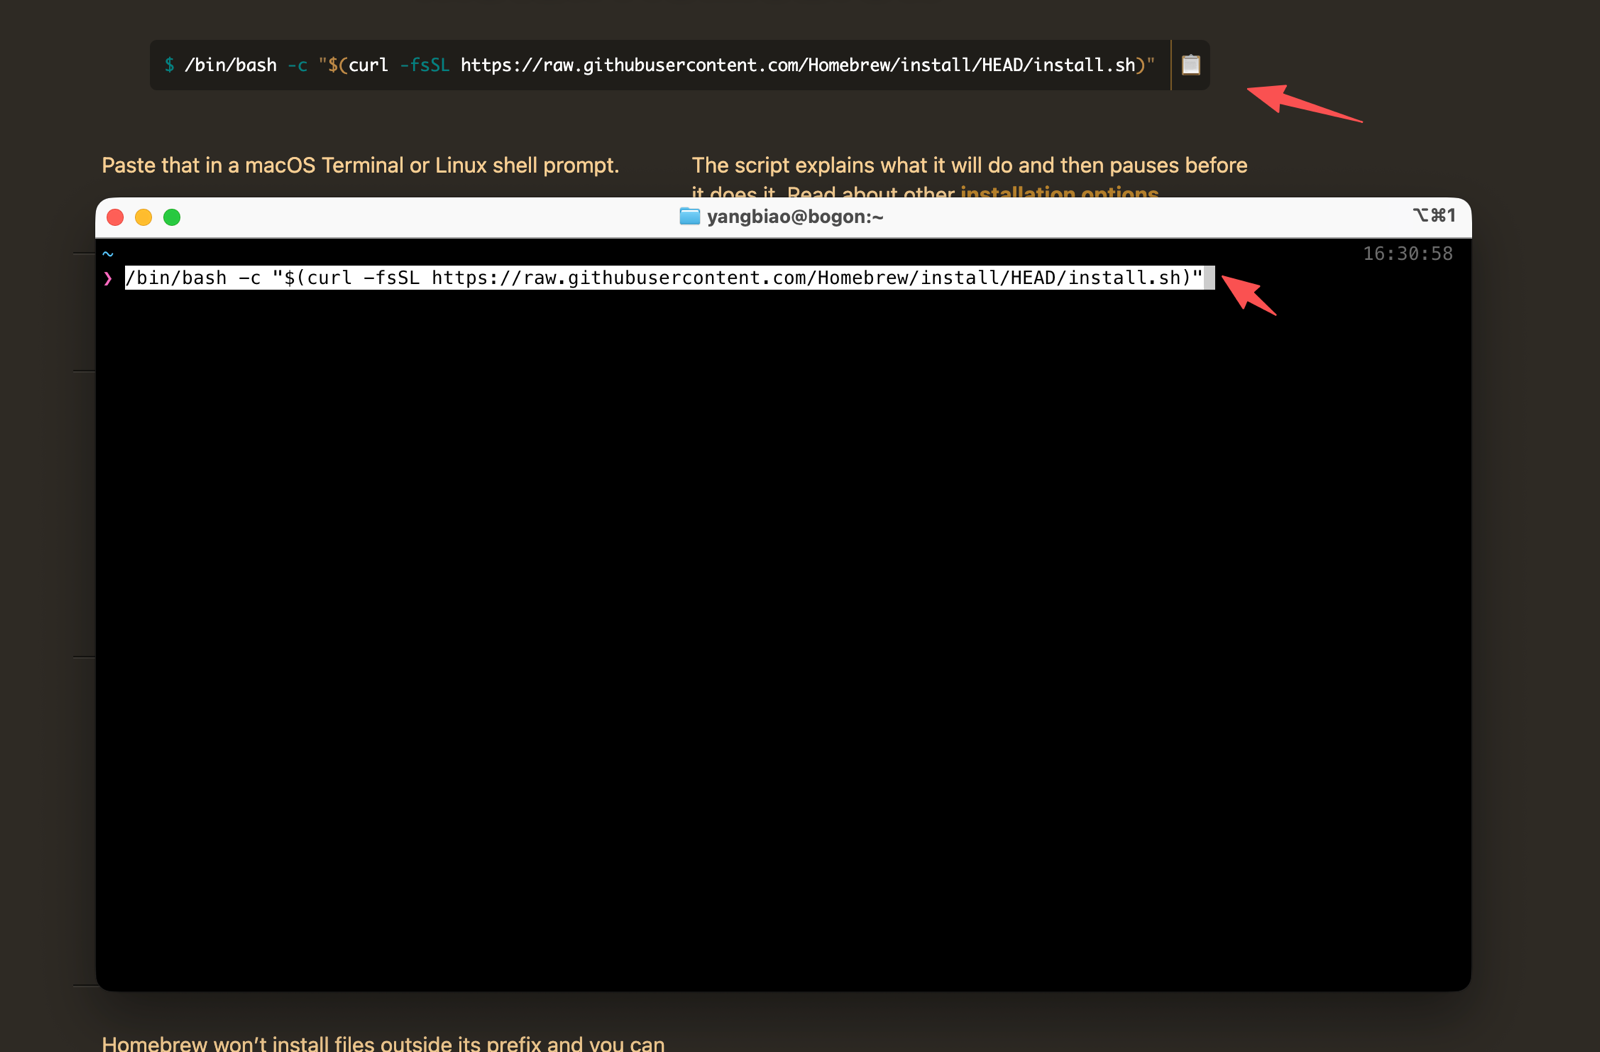
Install Homebrew
/bin/bash -c "$(curl -fsSL https://raw.githubusercontent.com/Homebrew/install/HEAD/install.sh)"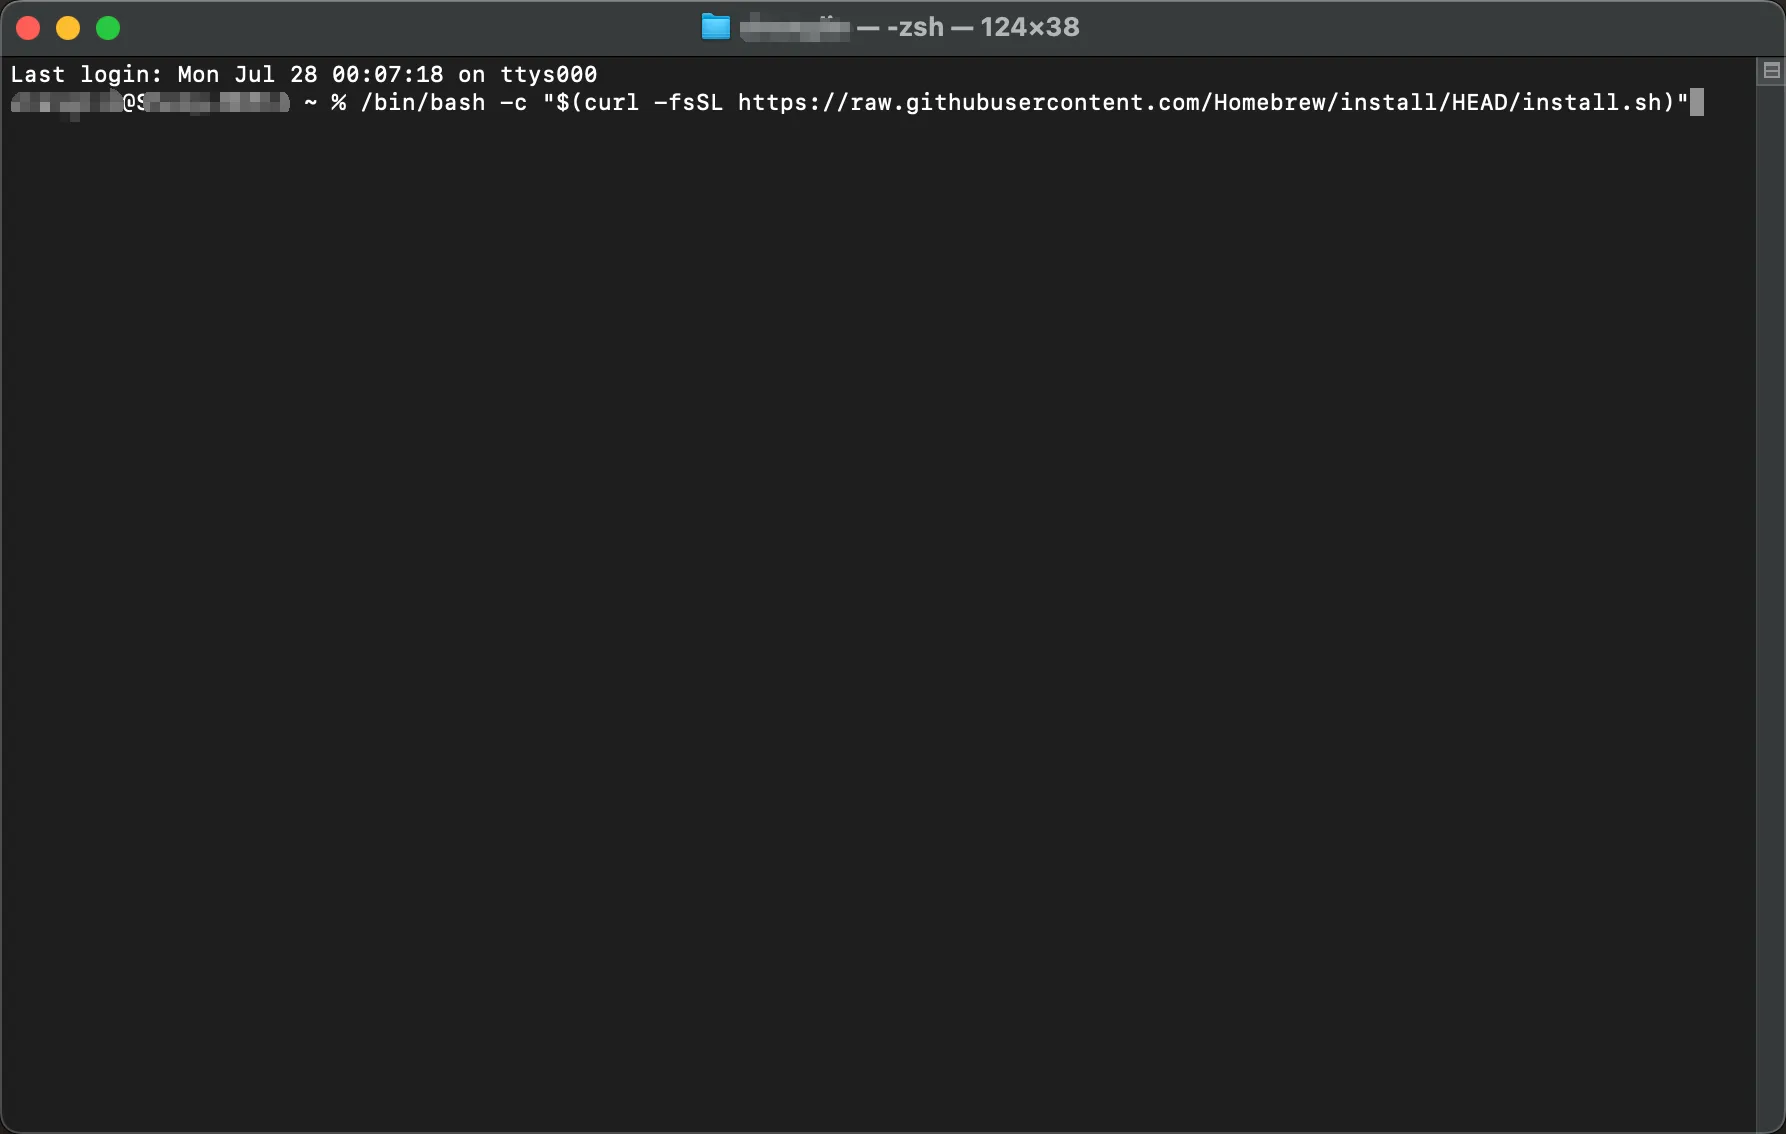
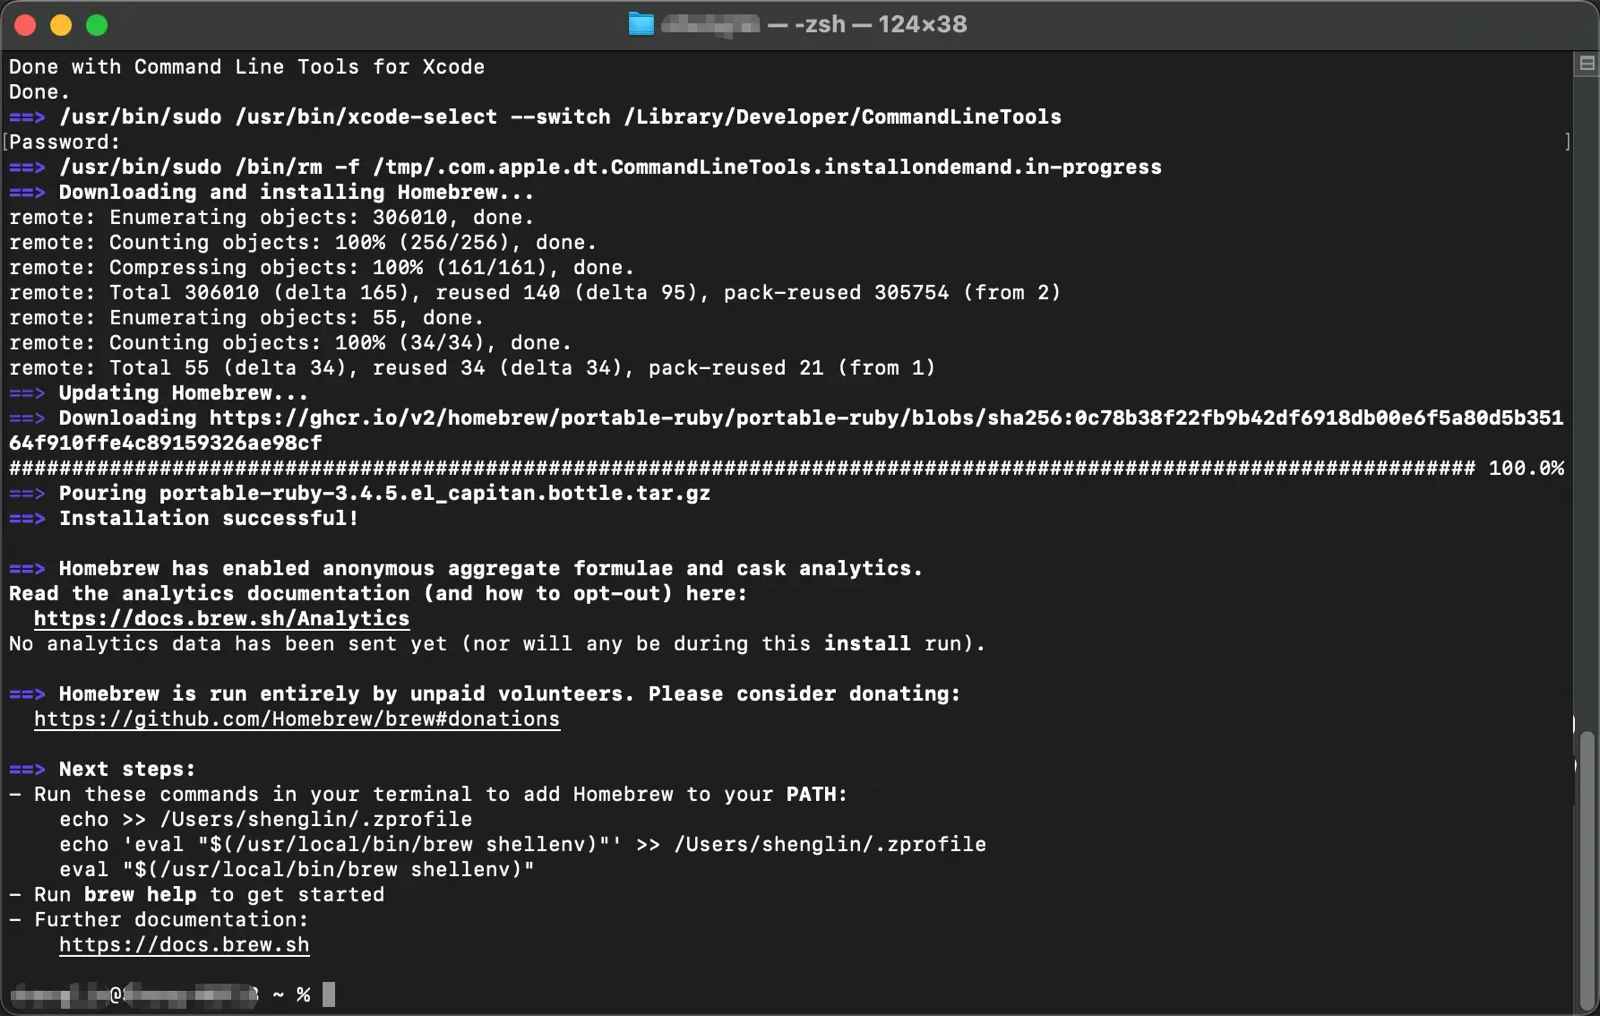
2. Install the Node.js environment
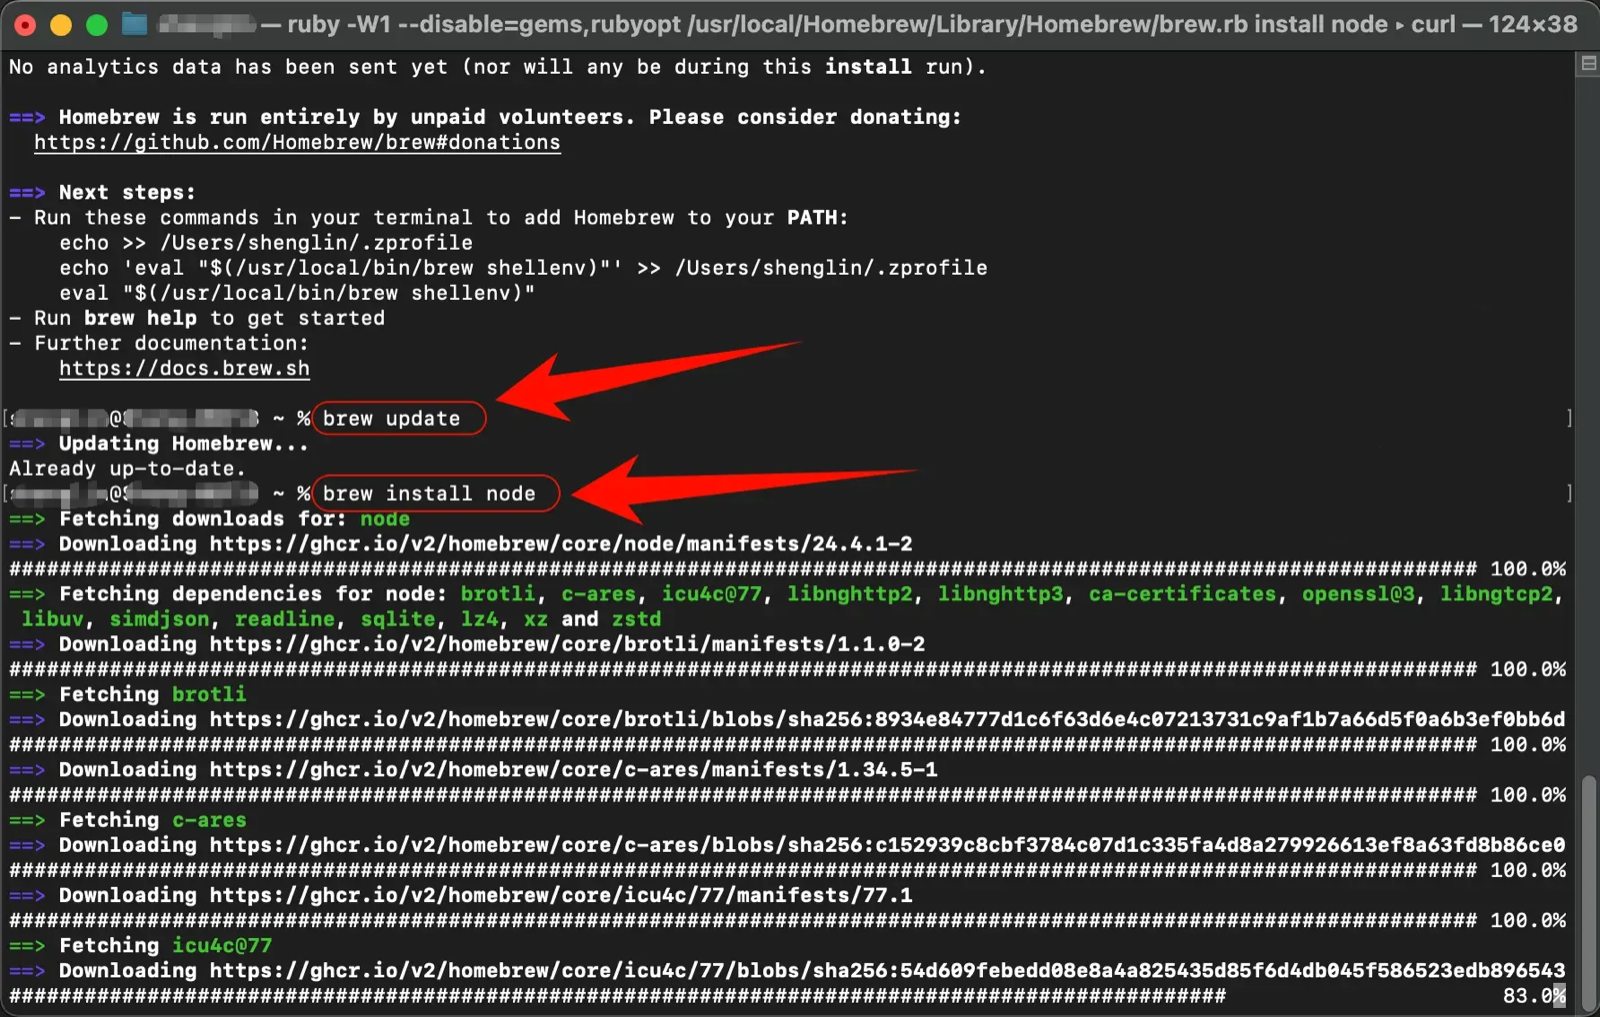
Steps to install the Node.js environment
Update Homebrew:
brew updateInstall Node.js:
brew install nodemacOS notes
- If you run into permission issues, you may need to use
sudo - On first run, you may need to allow it in System Preferences
- Terminal or iTerm2 is recommended
Verify the installation
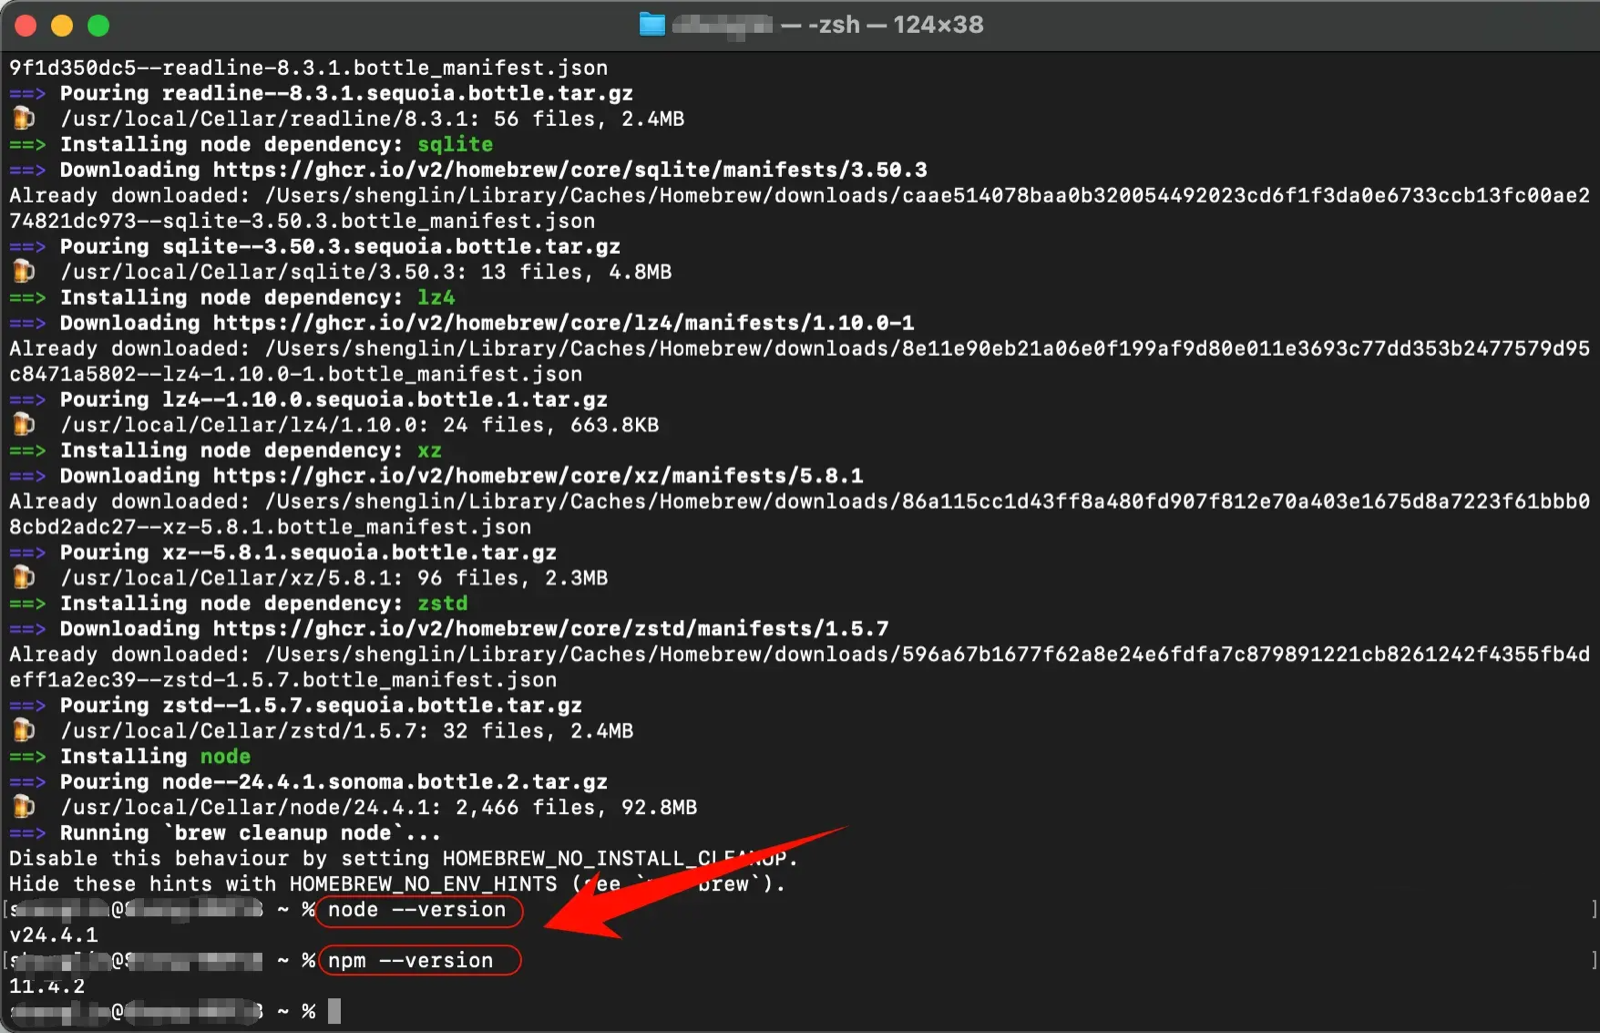
After installation, open a terminal and run the following commands:
node --version
npm --version
If a version number is displayed, the installation was successful.
3. Install Codex CLI
Install Codex CLI
Open a terminal and run the following command:
# Install Codex CLI globally
npm install -g @openai/codex
If you run into permission issues, use sudo:
sudo npm install -g @openai/codex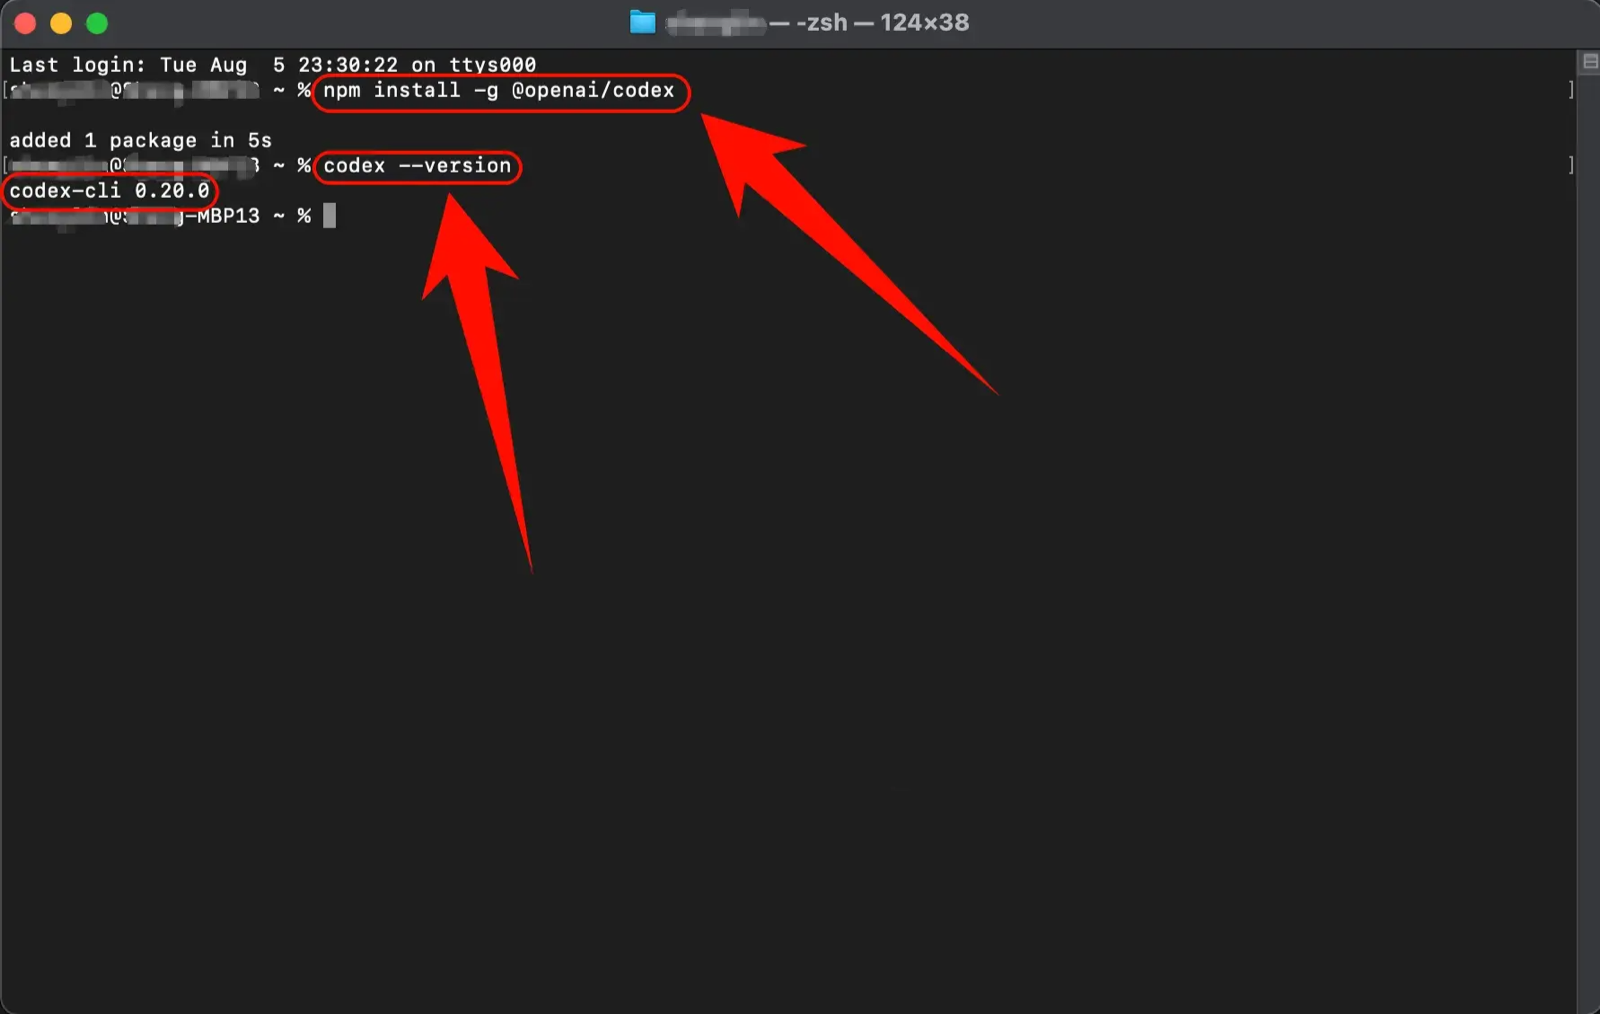
Verify the Codex CLI installation
After installation, run the following command to check whether it succeeded:
codex --versionIf a version number is displayed, congratulations! Codex CLI is installed.
4. Modify the configuration file
One-click modification of the Codex CLI configuration file
curl -fsSL https://your-domain/cli/install.sh | sh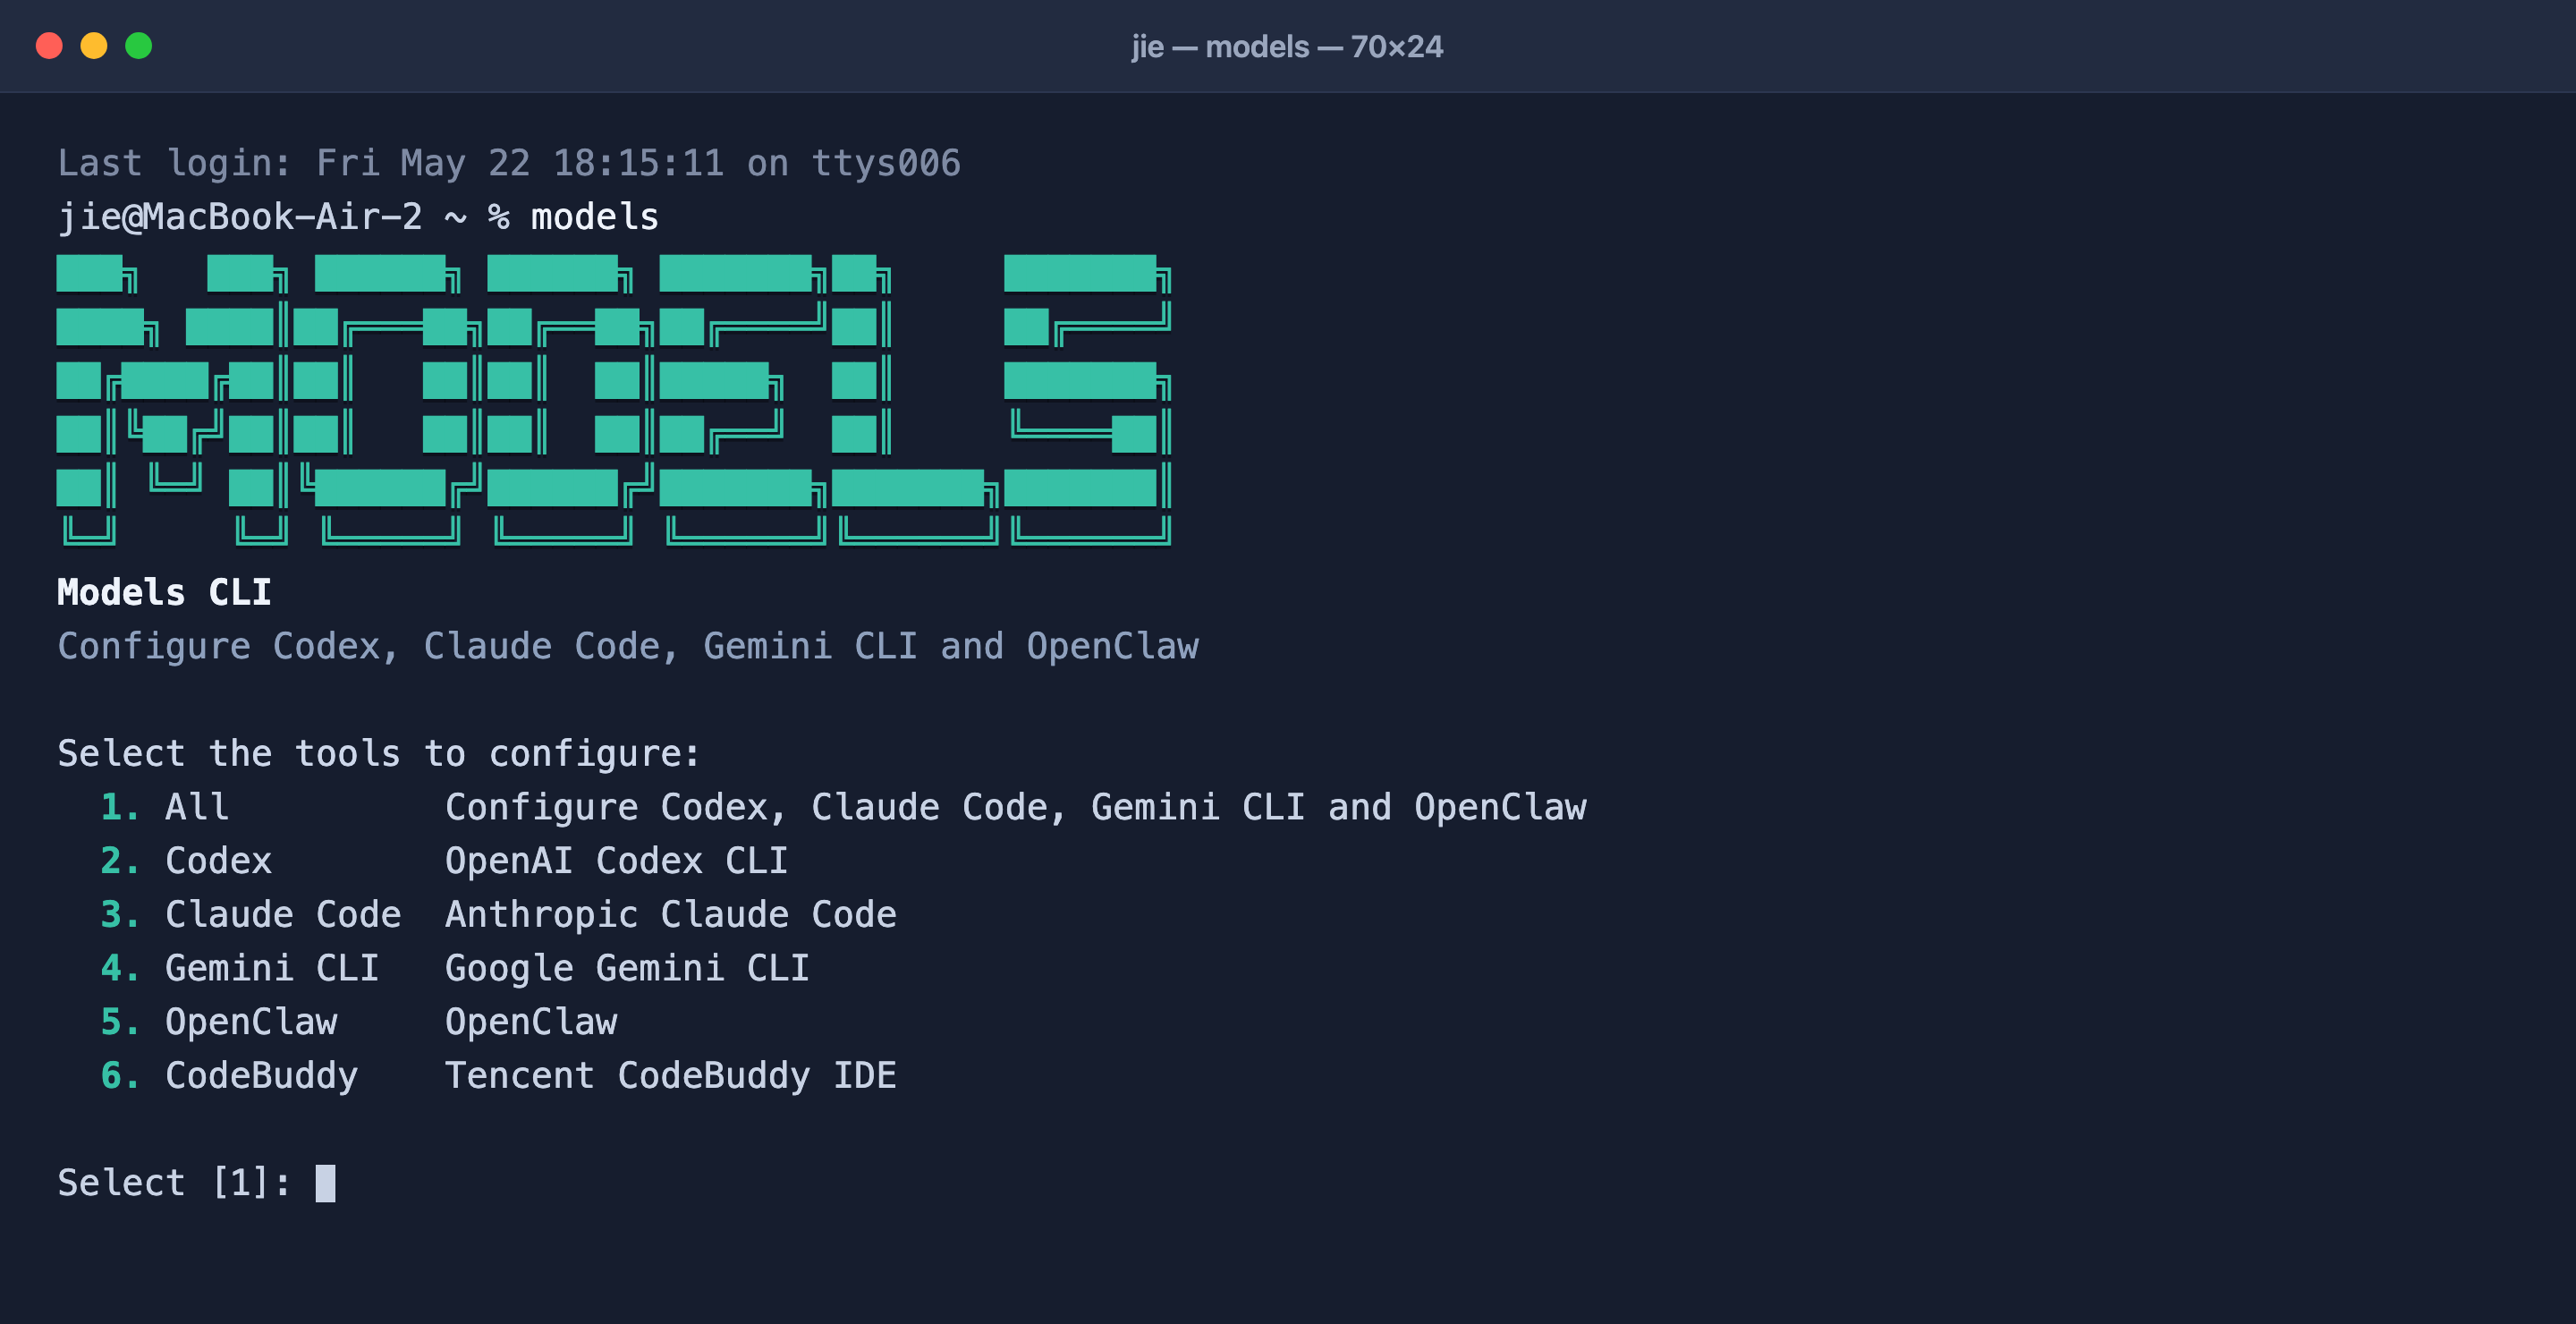
5. Start using Codex CLI
Now you can start using Codex CLI!
Launch Codex CLI
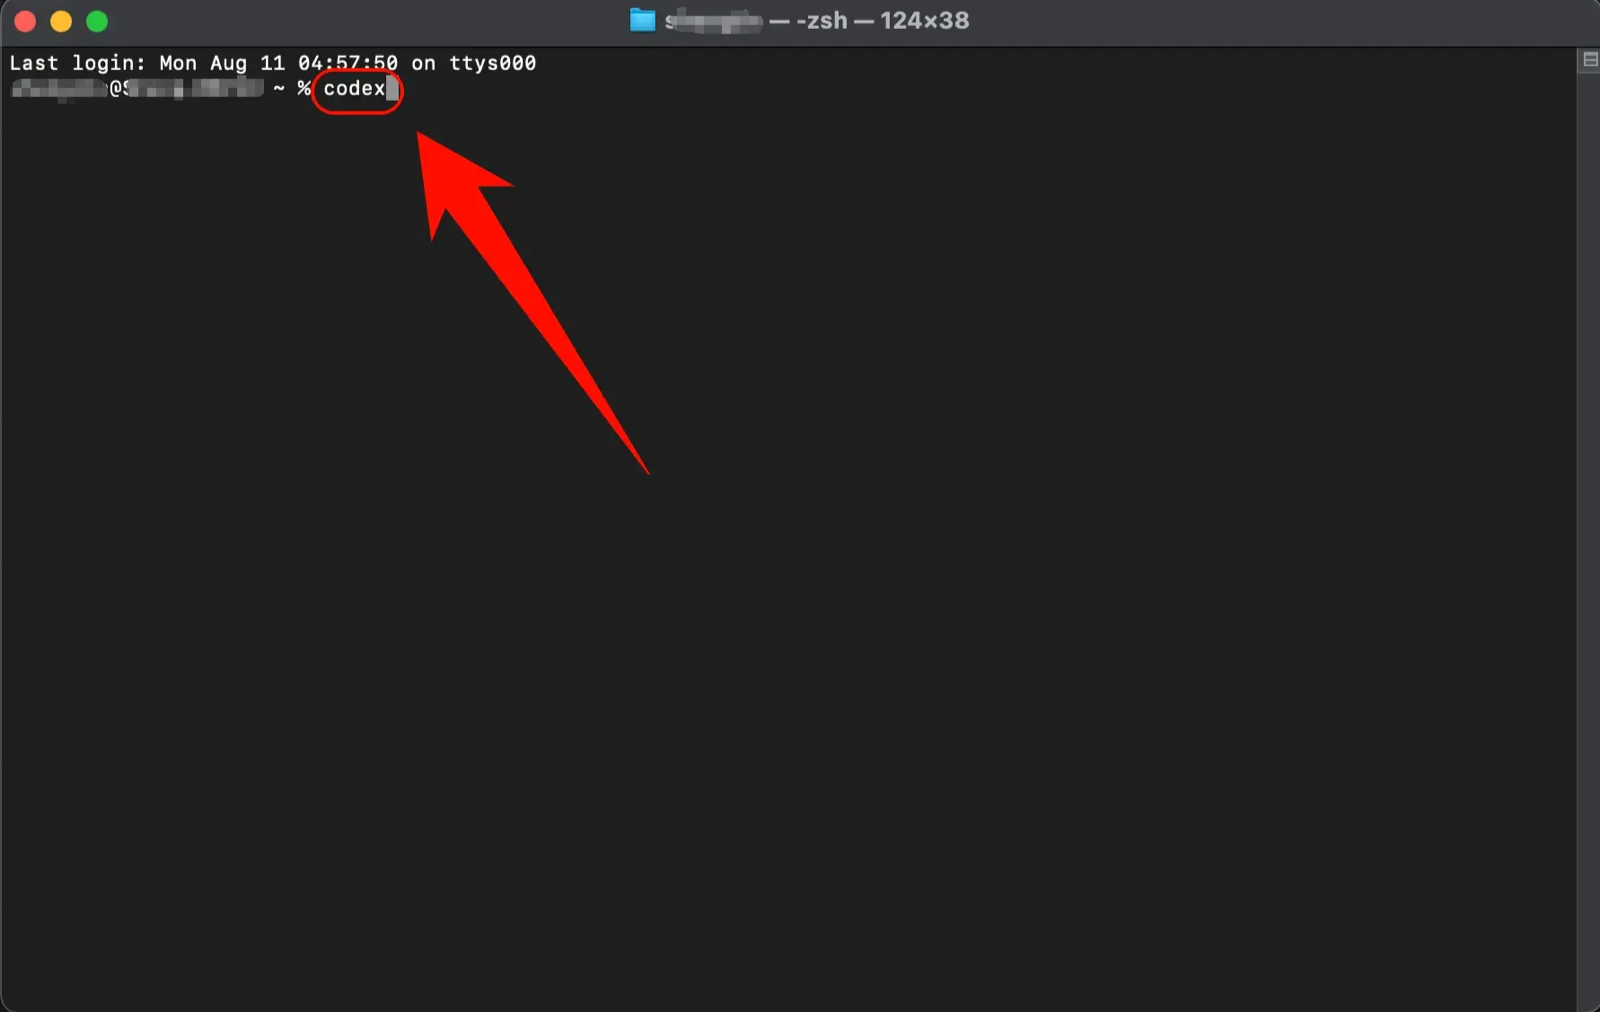
Launch Codex CLI directly:
codexUse it within a specific project:
cd /path/to/your/project
codex
Press Enter to launch Codex CLI.
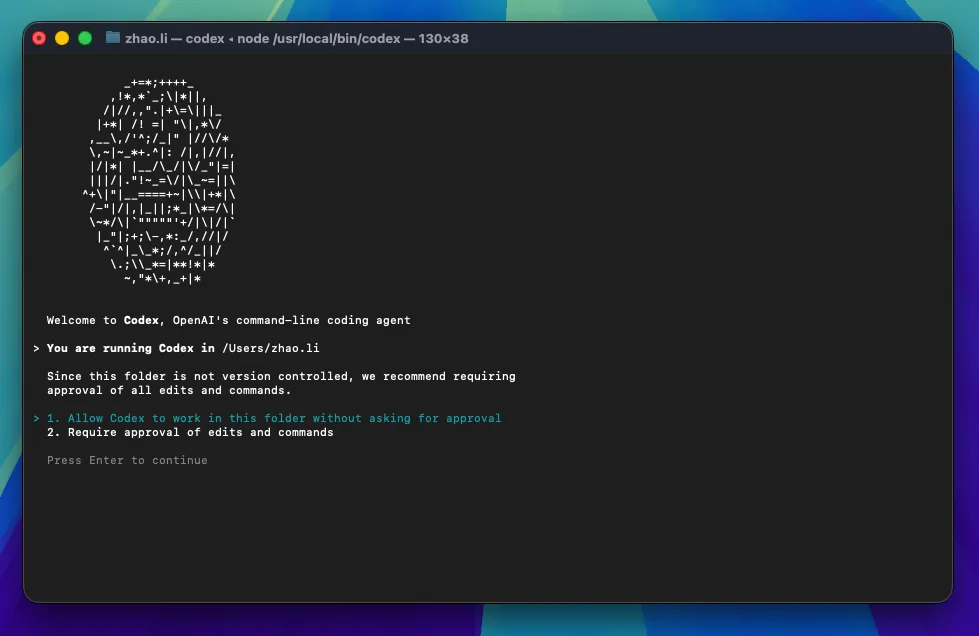
Set Codex CLI permissions: 1. Allow Codex to edit files directly; 2. Require manual authorization for Codex to edit files
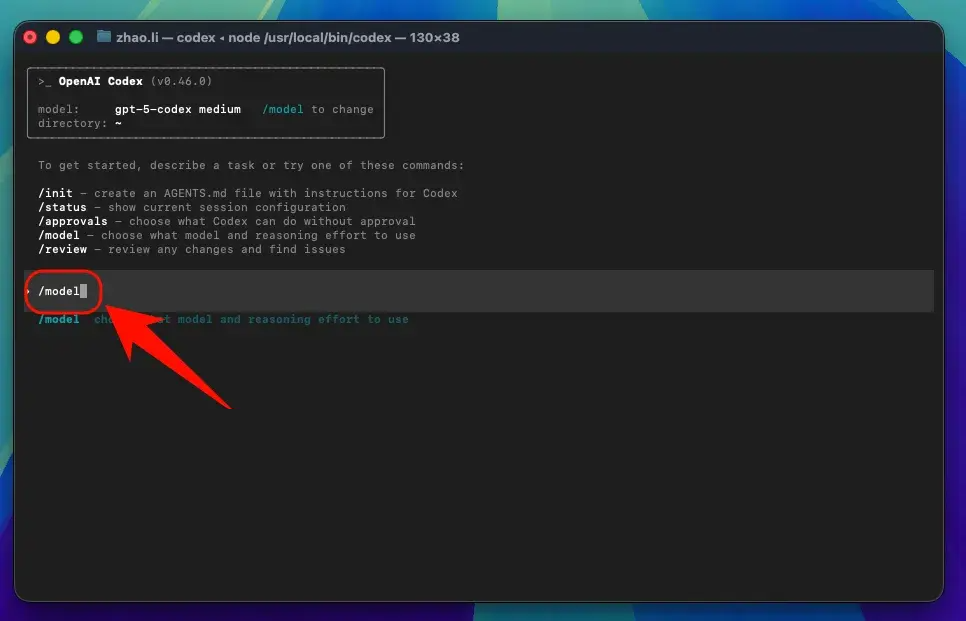
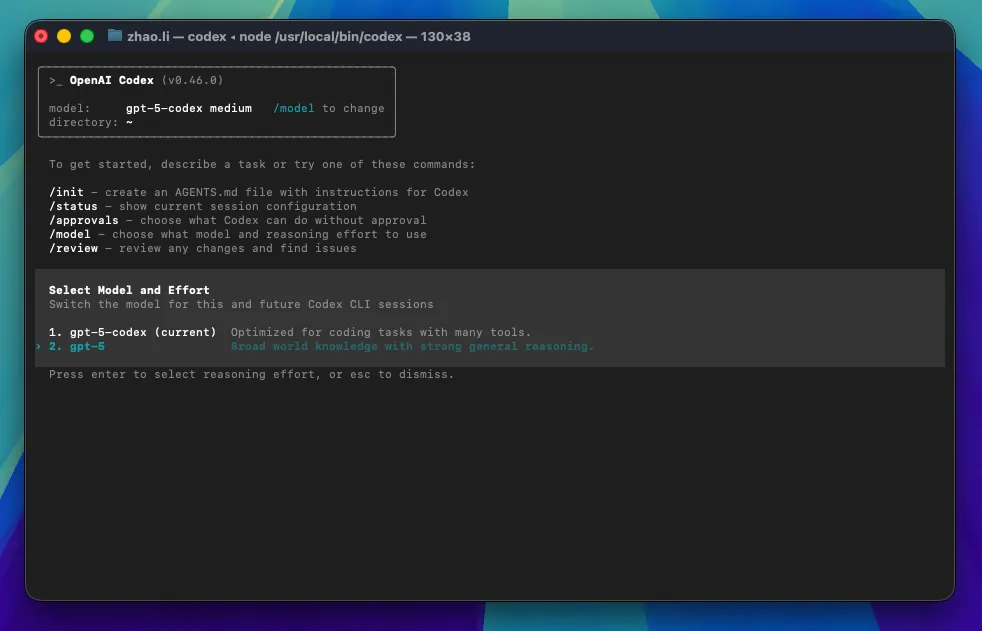
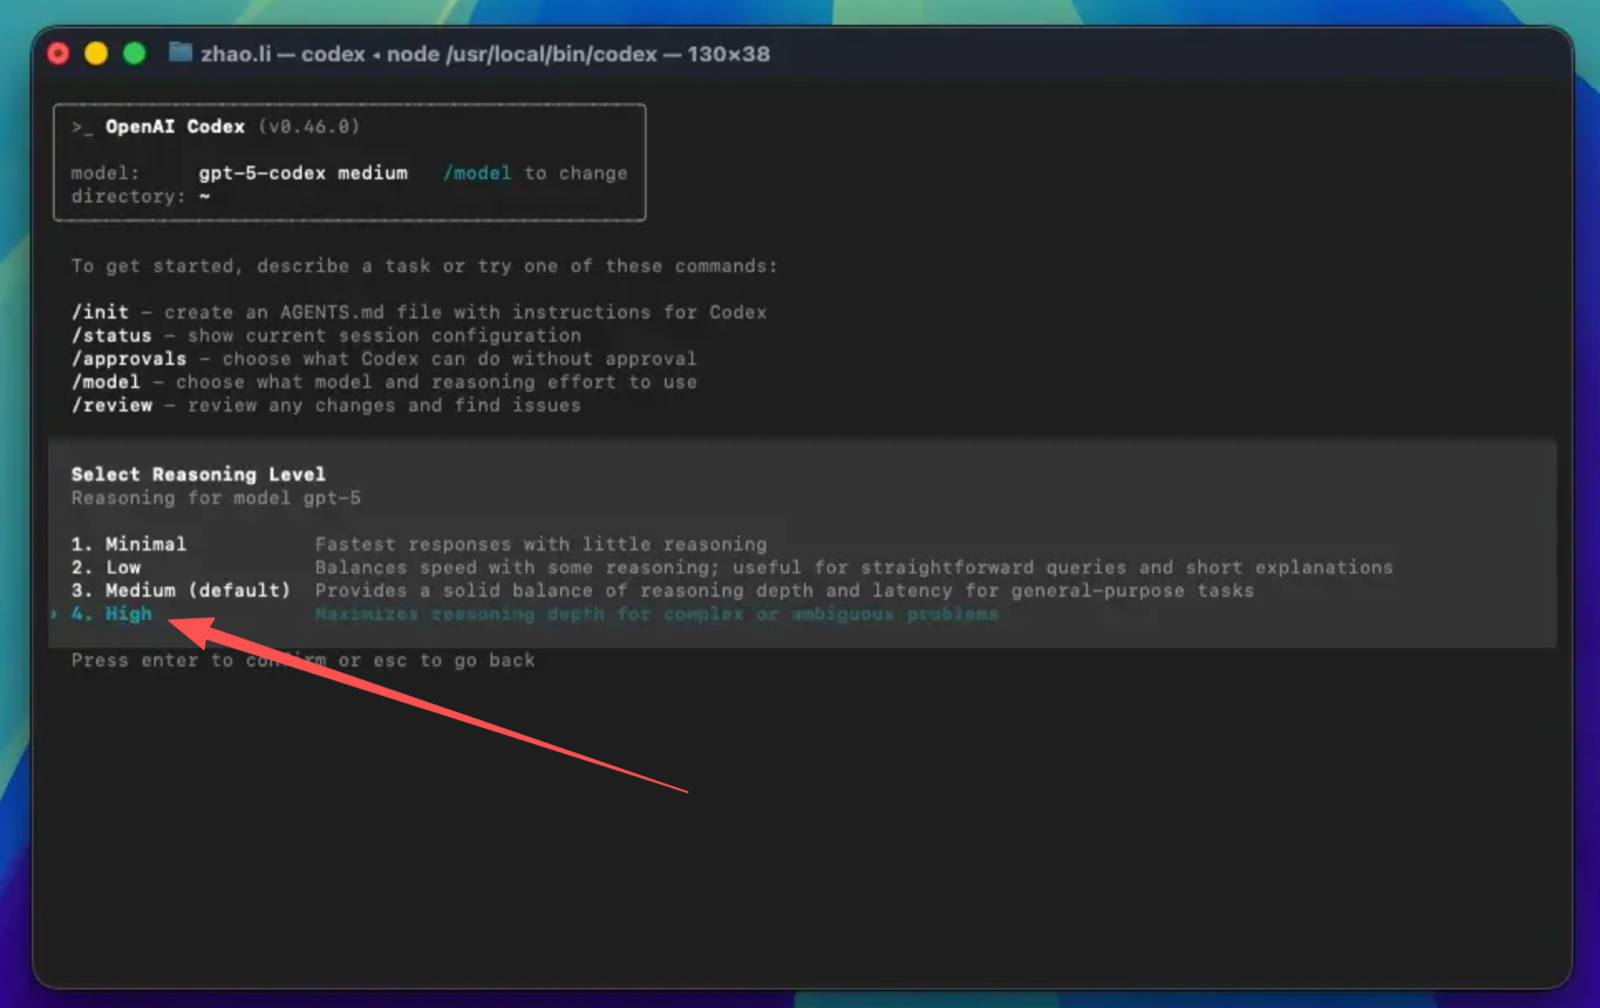
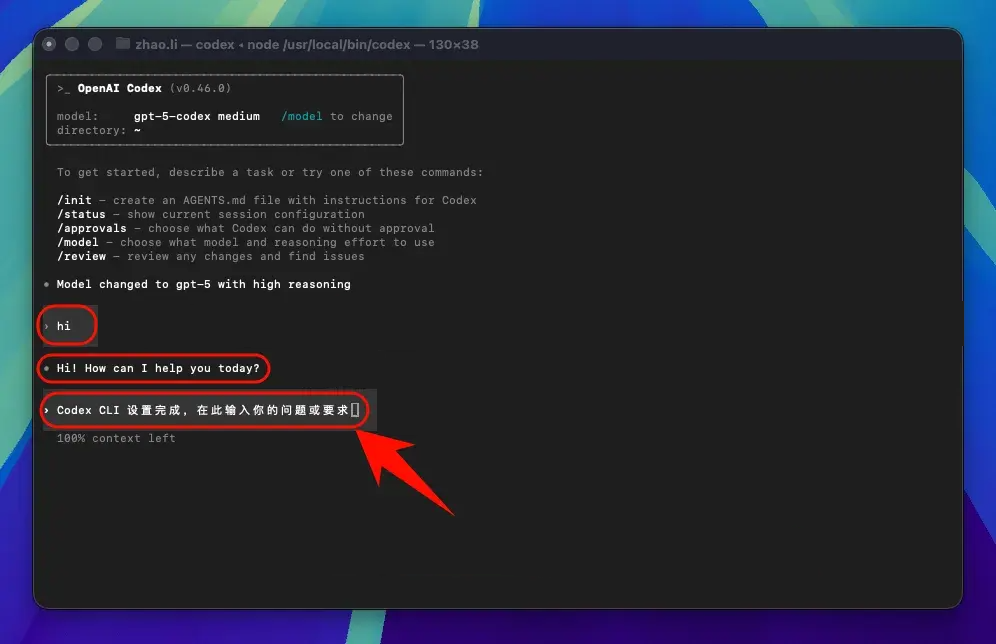
Note: After changing the API endpoint, all models (including the official preset models) will call your custom endpoint instead of using your official account quota.
6. Common macOS troubleshooting
Permission error during installation
Try the following solutions:
- Install with
sudo:sudo npm install -g @openai/codex - Or configure
npmto use a user directory:npm config set prefix ~/.npm-global
macOS security settings block it from running
If the system blocks Codex CLI from running:
- Open "System Preferences" → "Security & Privacy"
- Click "Open Anyway" or "Allow"
- Or run in Terminal:
sudo spctl --master-disable
Linux: Step-by-Step Guide
1. Install the Node.js environment
Codex CLI requires a Node.js environment to run.
Steps to install the Node.js environment
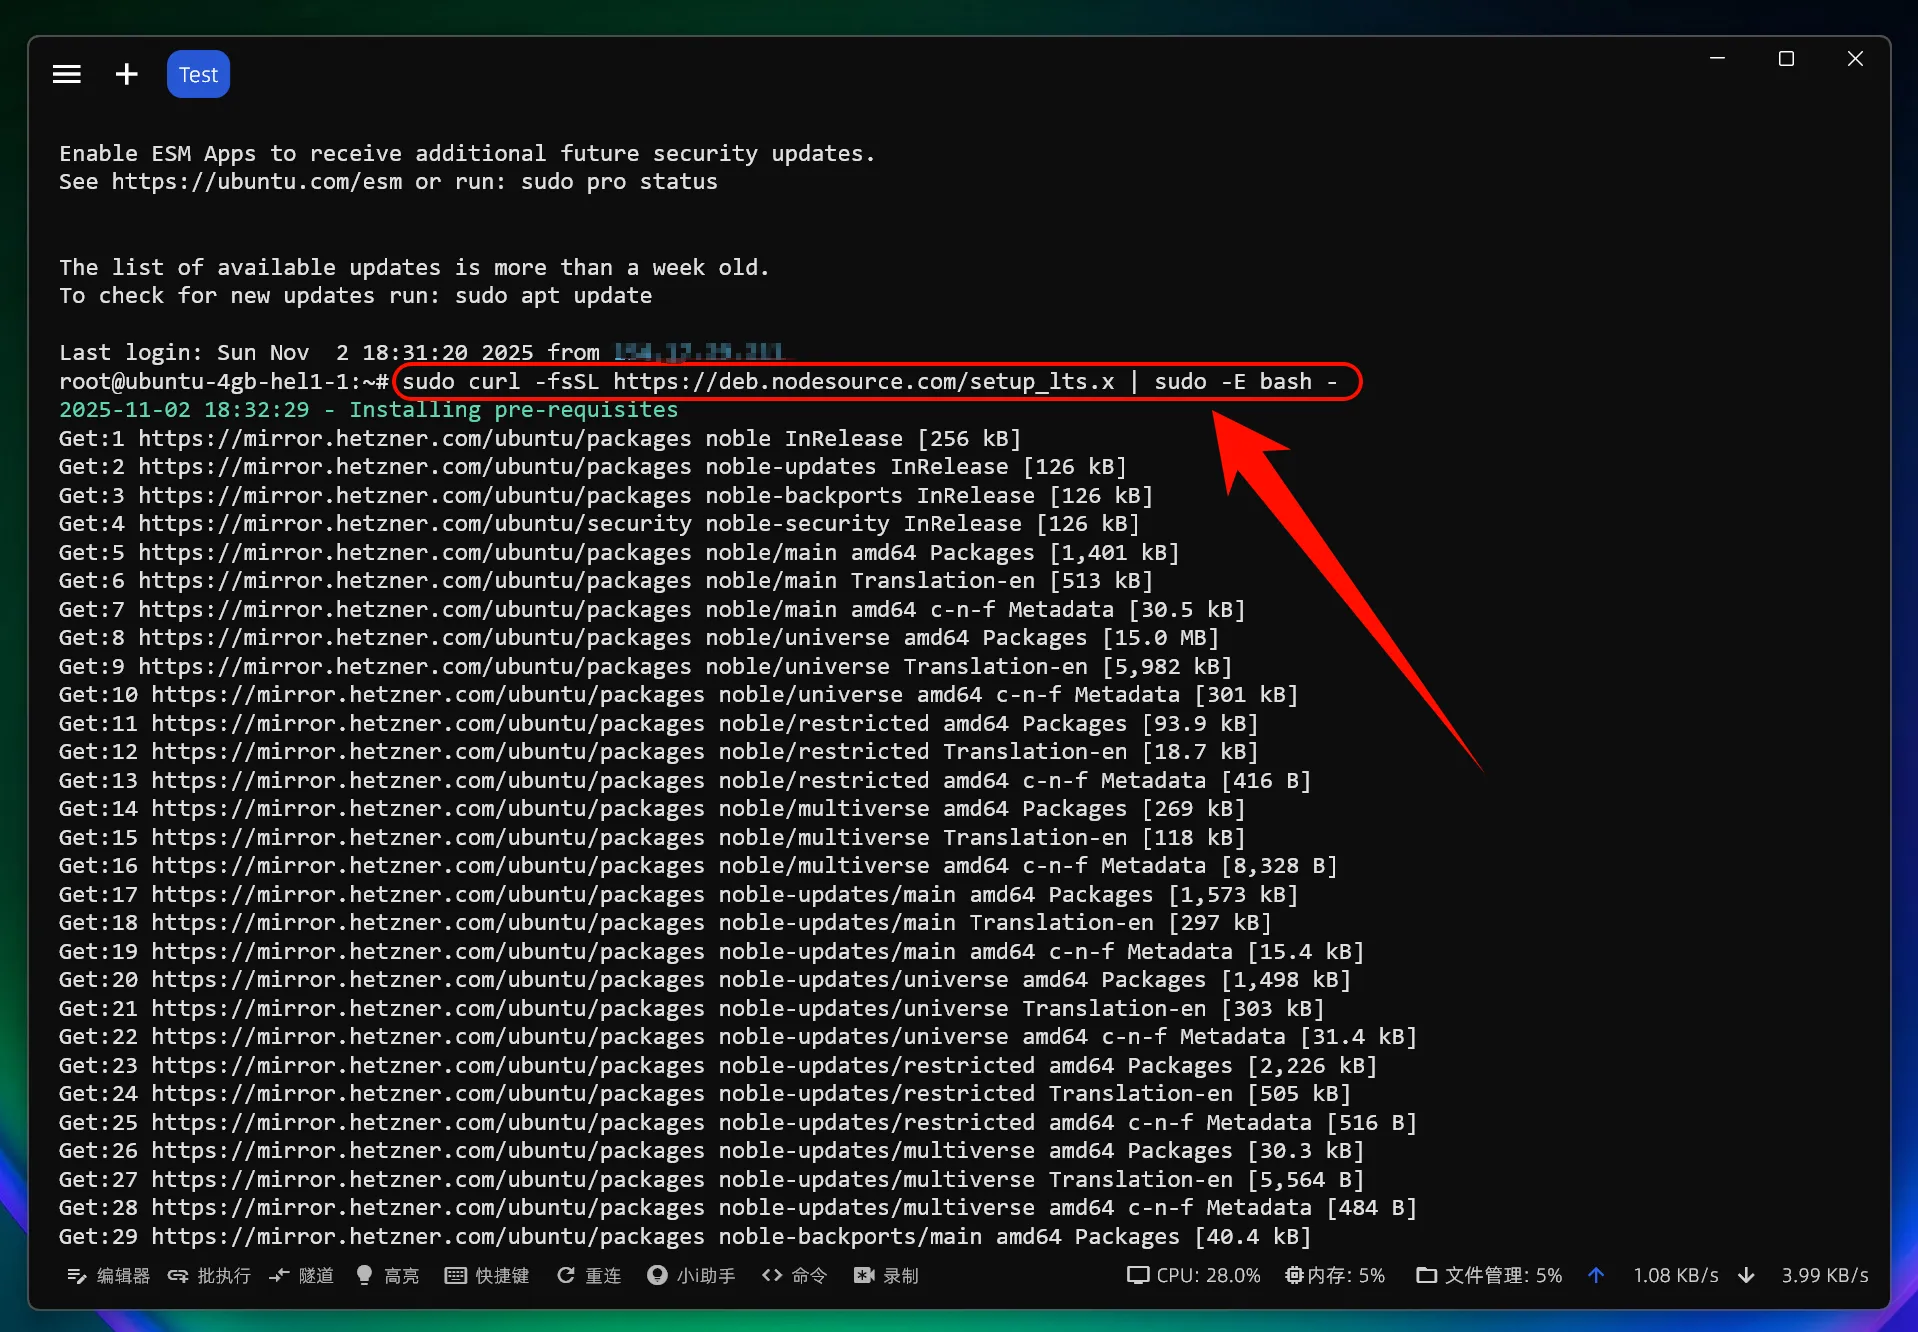
Add the NodeSource repository:
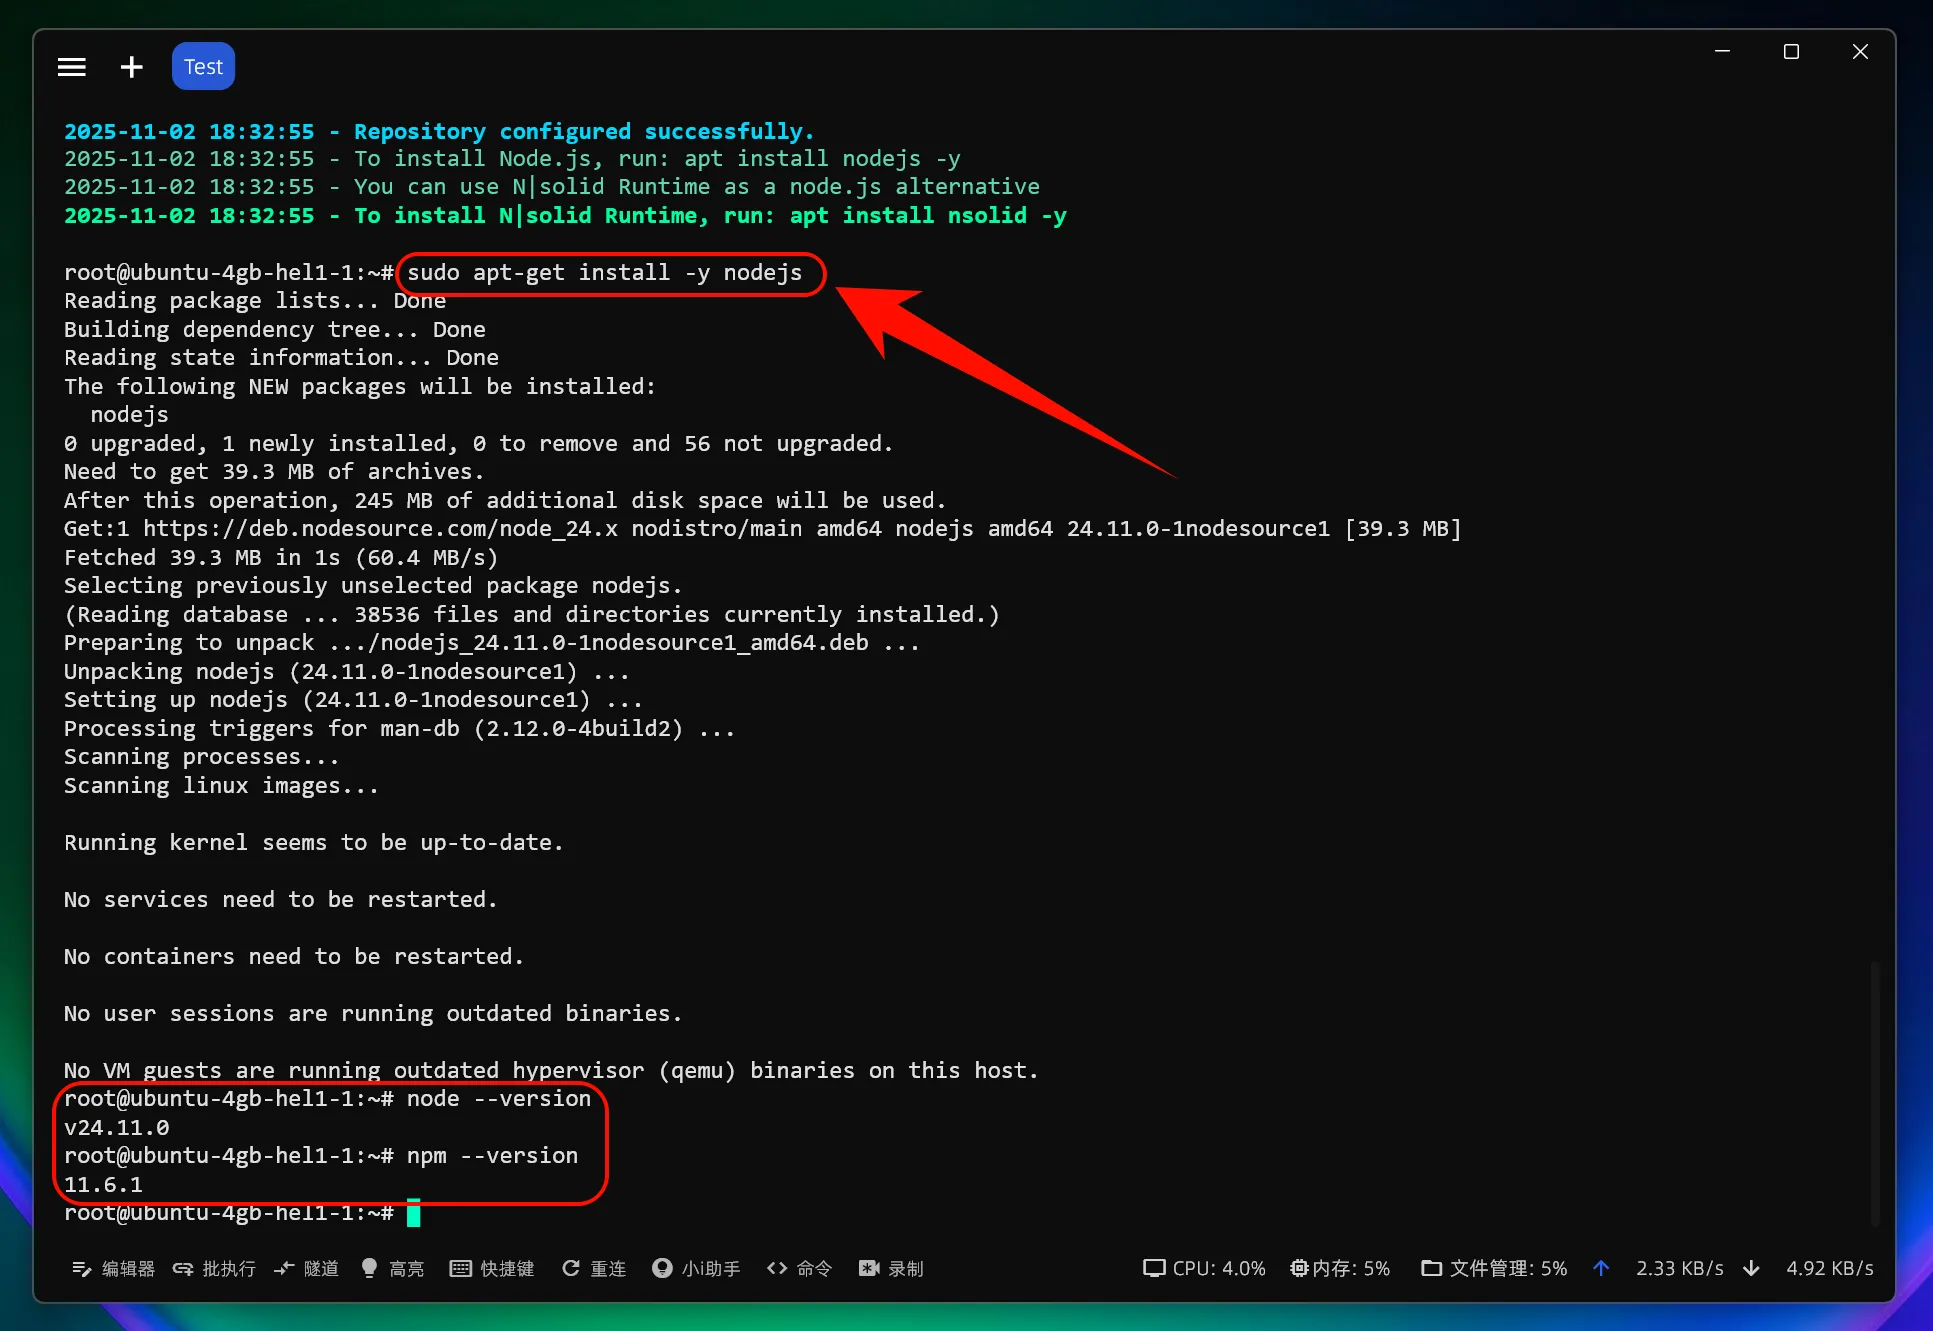
sudo curl -fsSL https://deb.nodesource.com/setup_lts.x | sudo -E bash -Install Node.js:
sudo apt-get install -y nodejsLinux notes
- Some distributions may require additional dependencies
- If you run into permission issues, use sudo
- Make sure your user has write access to npm's global directory
Verify the installation
After installation, open a terminal and run the following commands:
node --version
npm --version
If a version number is displayed, the installation was successful.
2. Install Codex CLI
Install Codex CLI
Open a terminal and run the following command:
# Install Codex CLI globally
npm install -g @openai/codex
If you run into permission issues, use sudo:
sudo npm install -g @openai/codex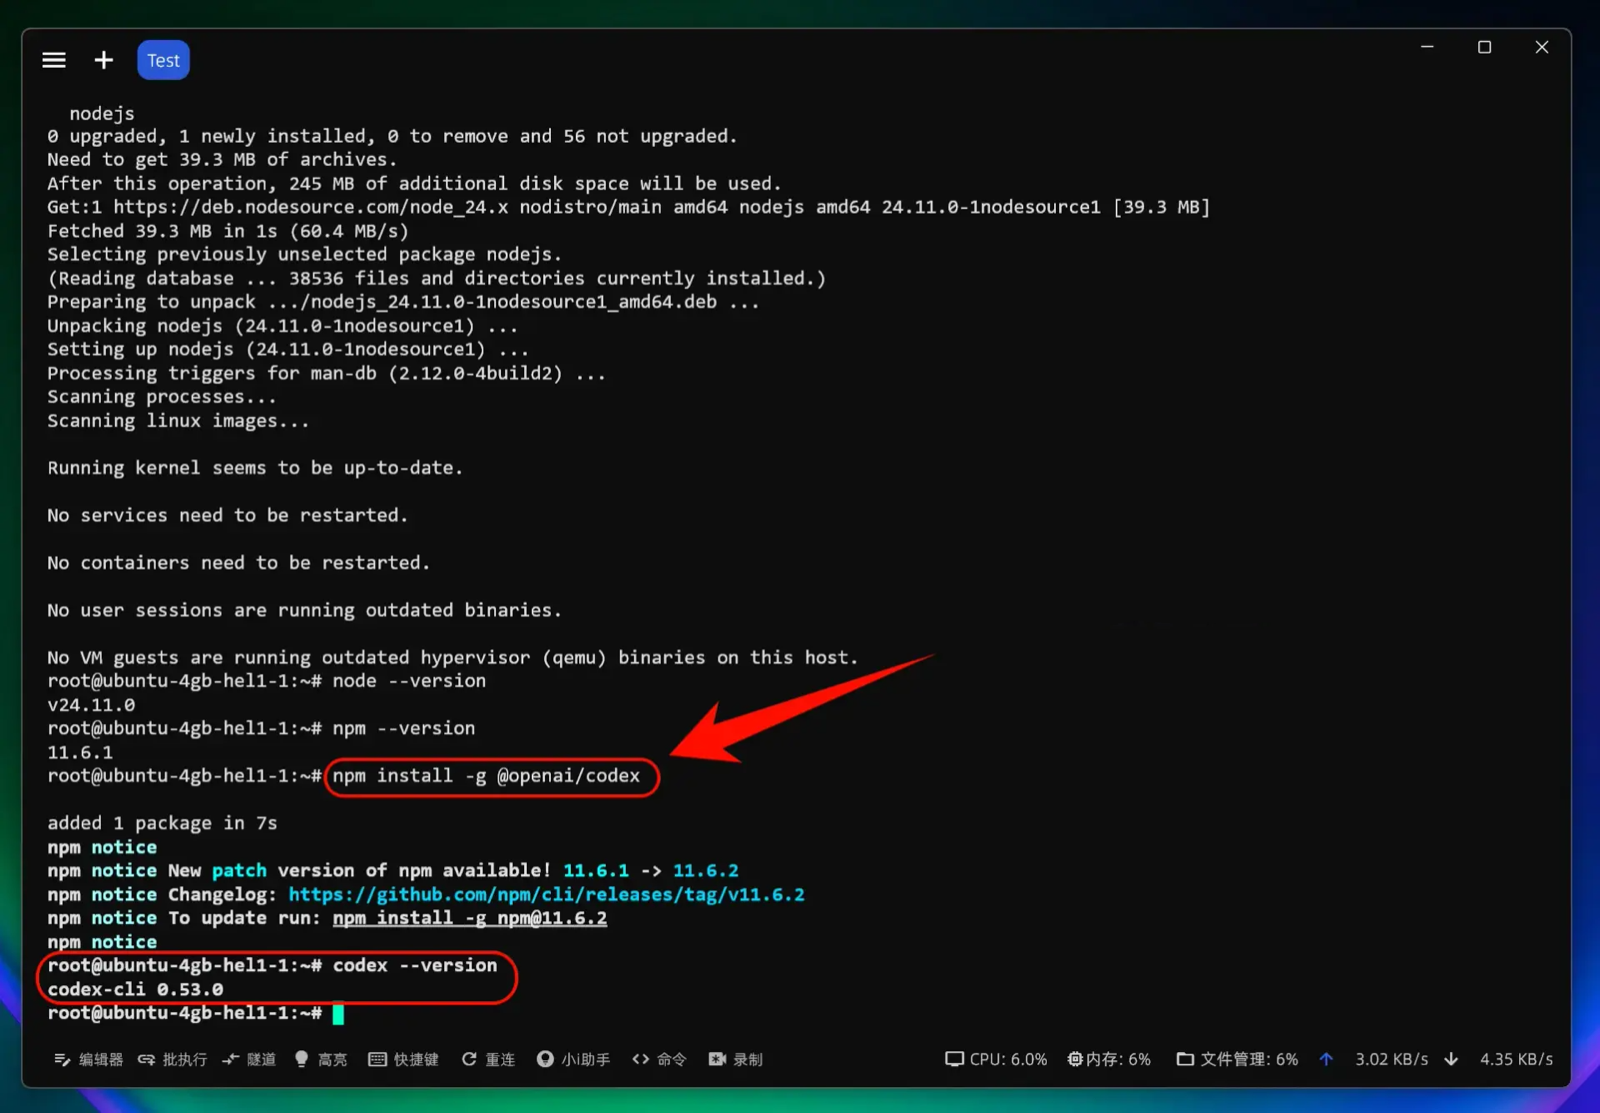
Verify the Codex CLI installation
After installation, run the following command to check whether it succeeded:
codex --versionIf a version number is displayed, congratulations! Codex CLI is installed.
3. Modify the configuration file
One-click modification of the Codex CLI configuration file
curl -fsSL https://your-domain/cli/install.sh | sh
4. Start using Codex CLI
Now you can start using Codex CLI!
Launch Codex CLI
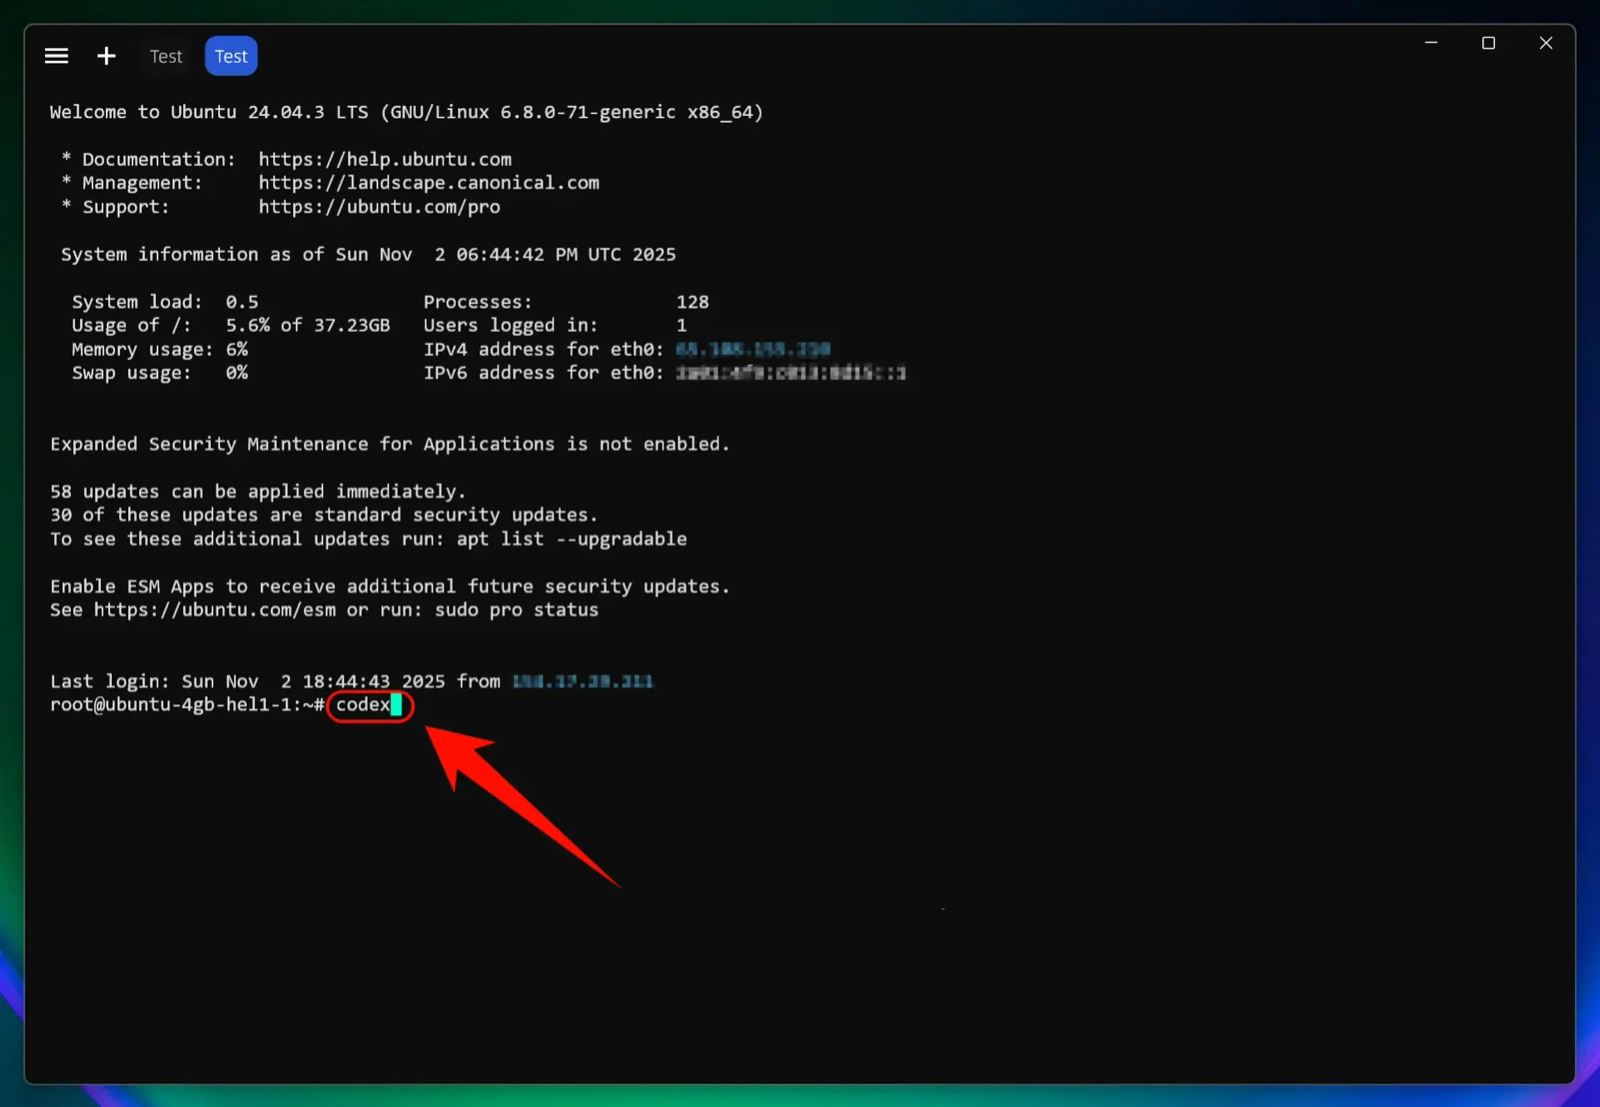
Launch Codex CLI directly:
codexUse it within a specific project:
# Enter your project directory
cd /path/to/your/project

# Launch Codex CLI
codex
Press Enter to launch Codex CLI.
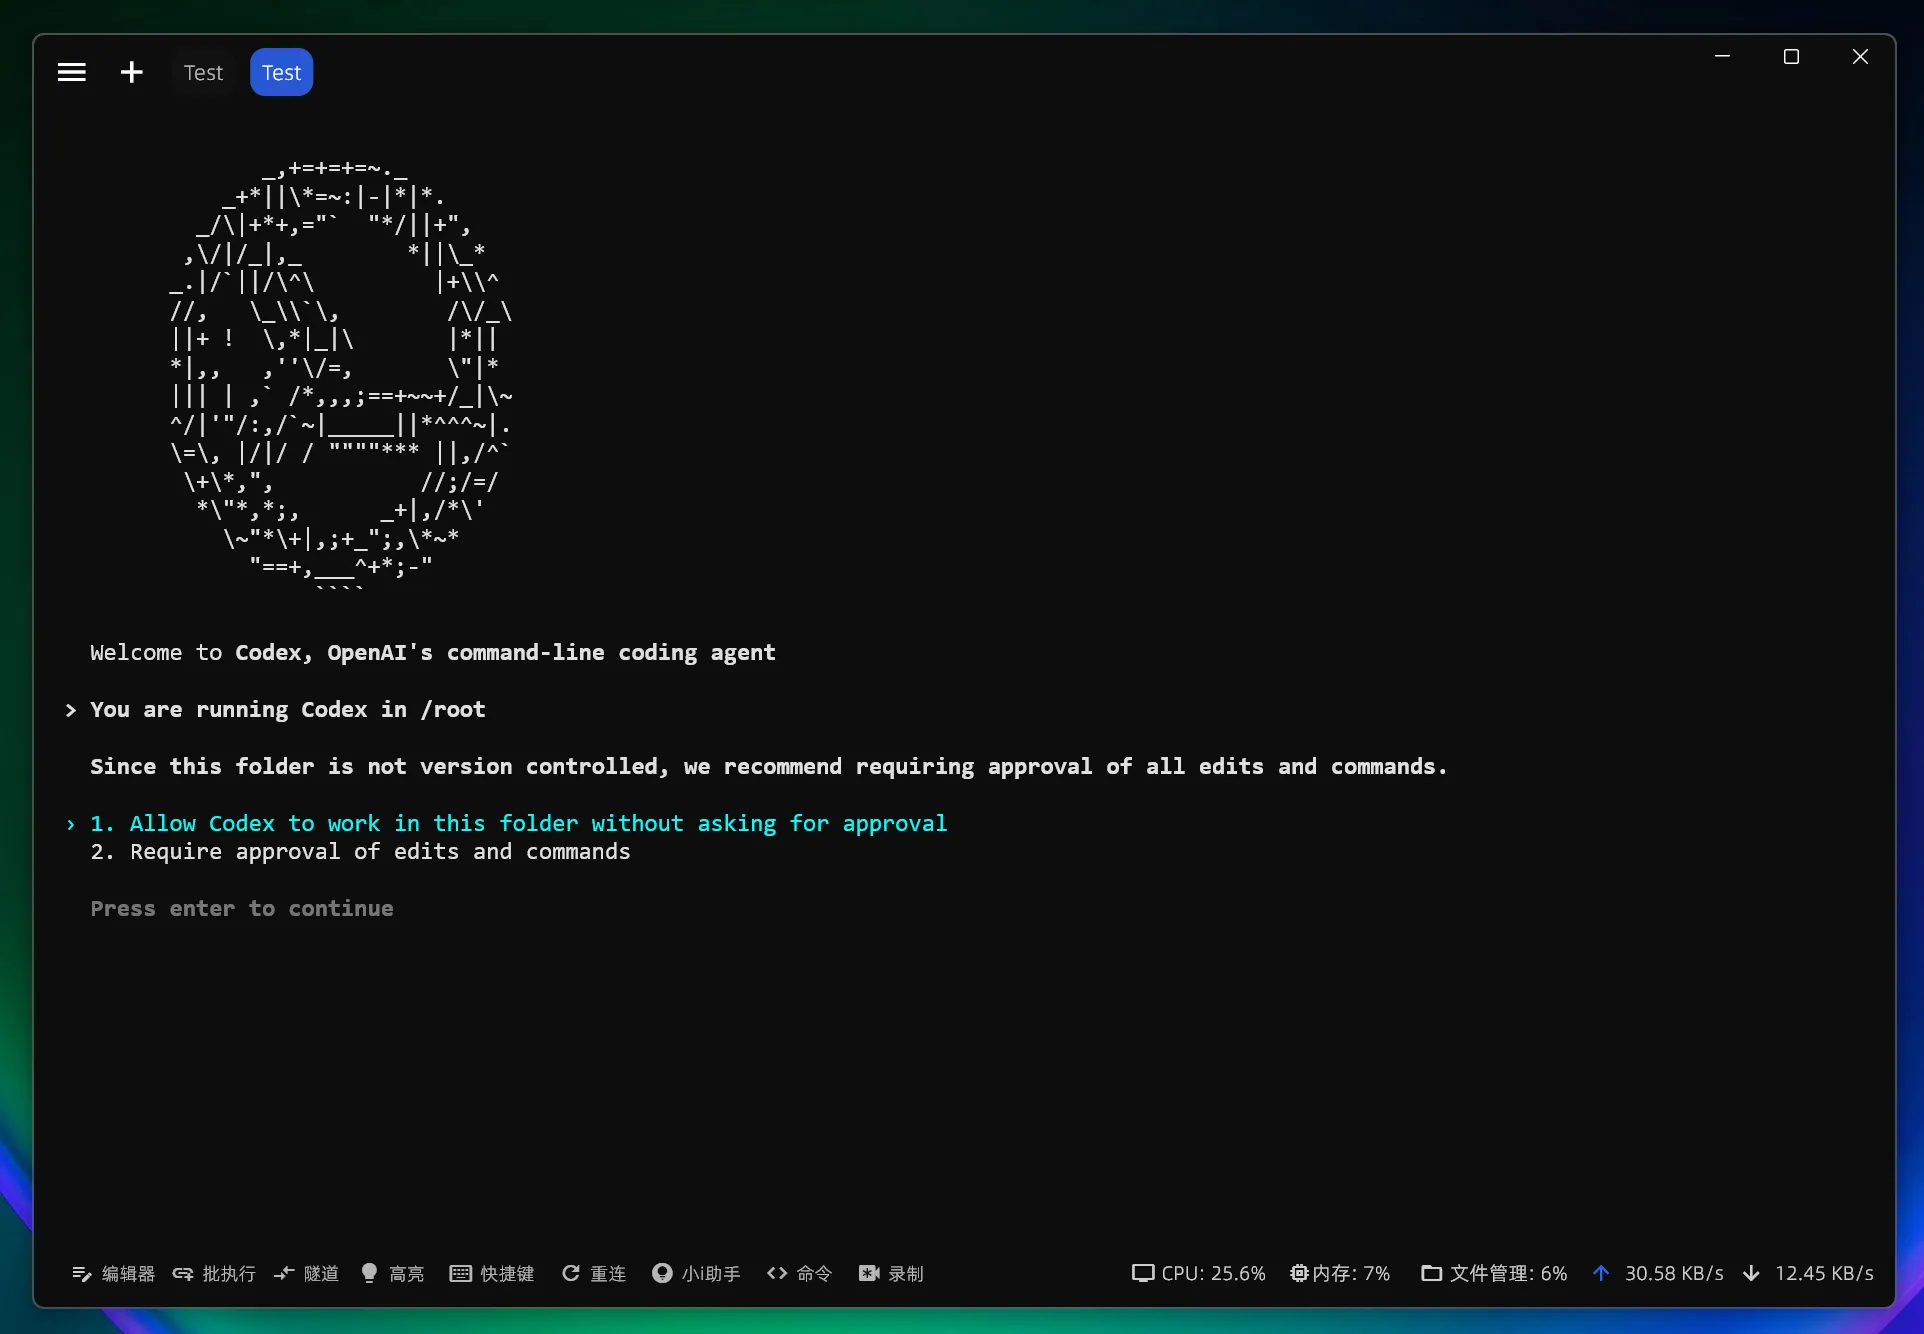
Set Codex CLI permissions: 1. Allow Codex to edit files directly; 2. Require manual authorization for Codex to edit files
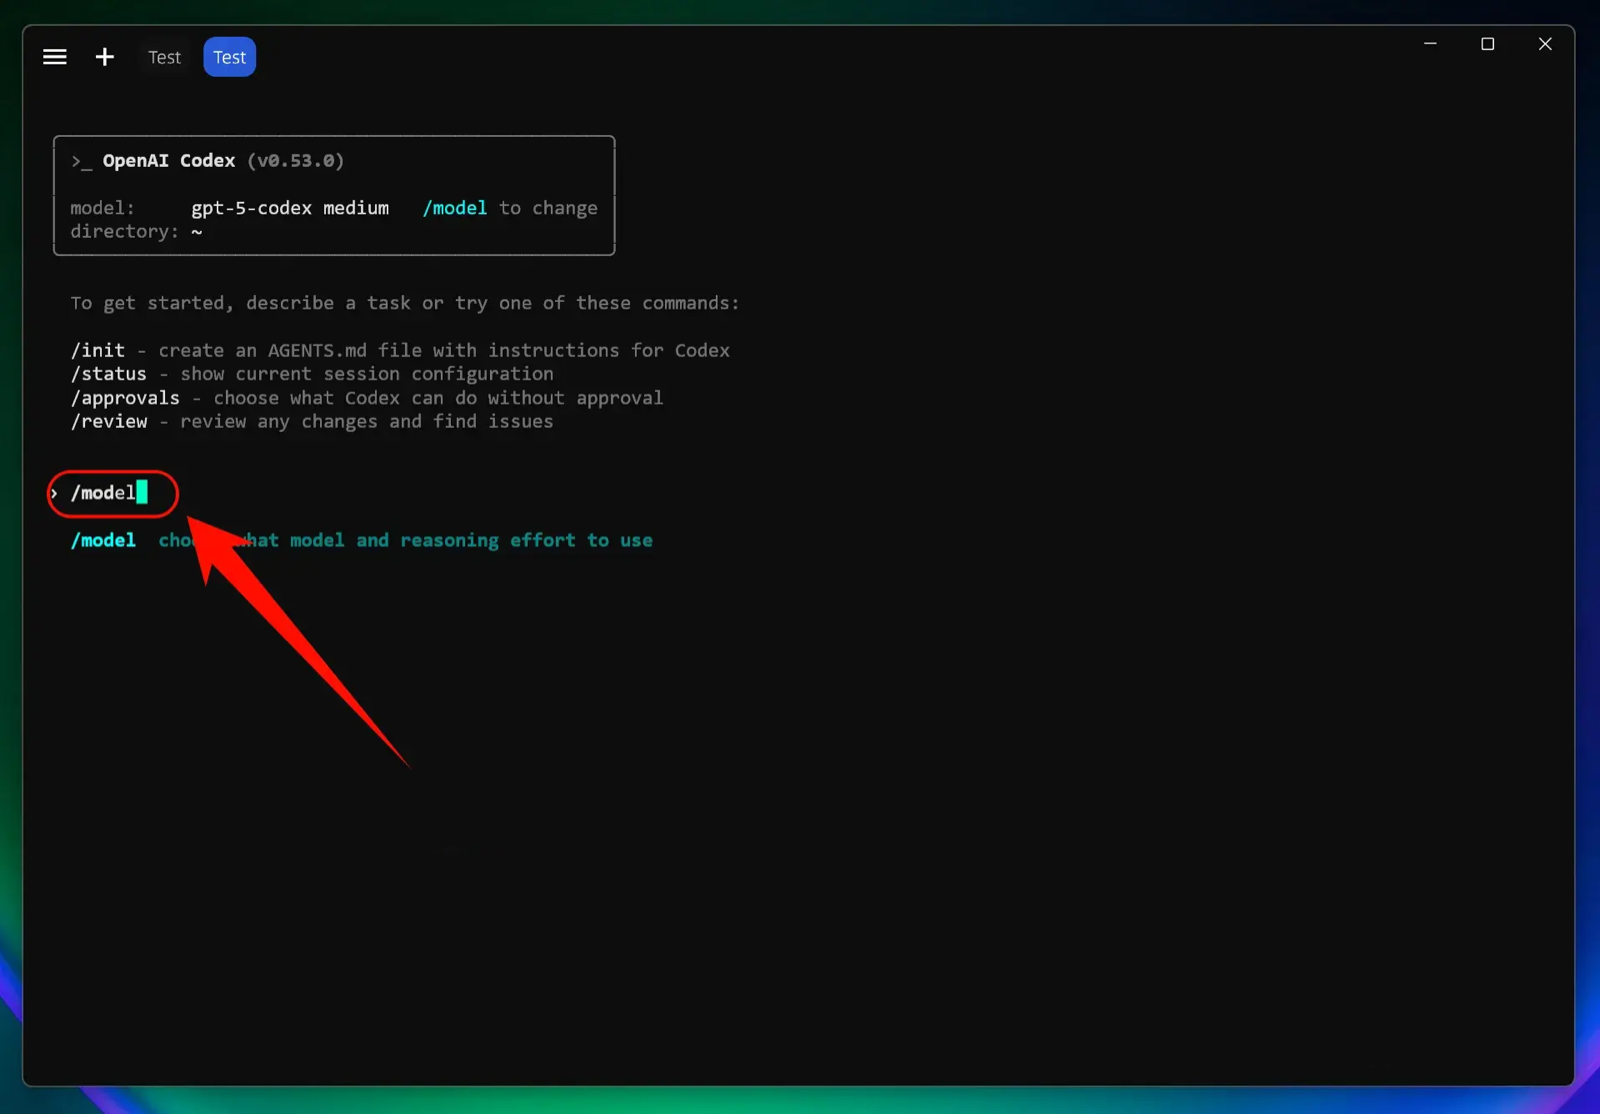
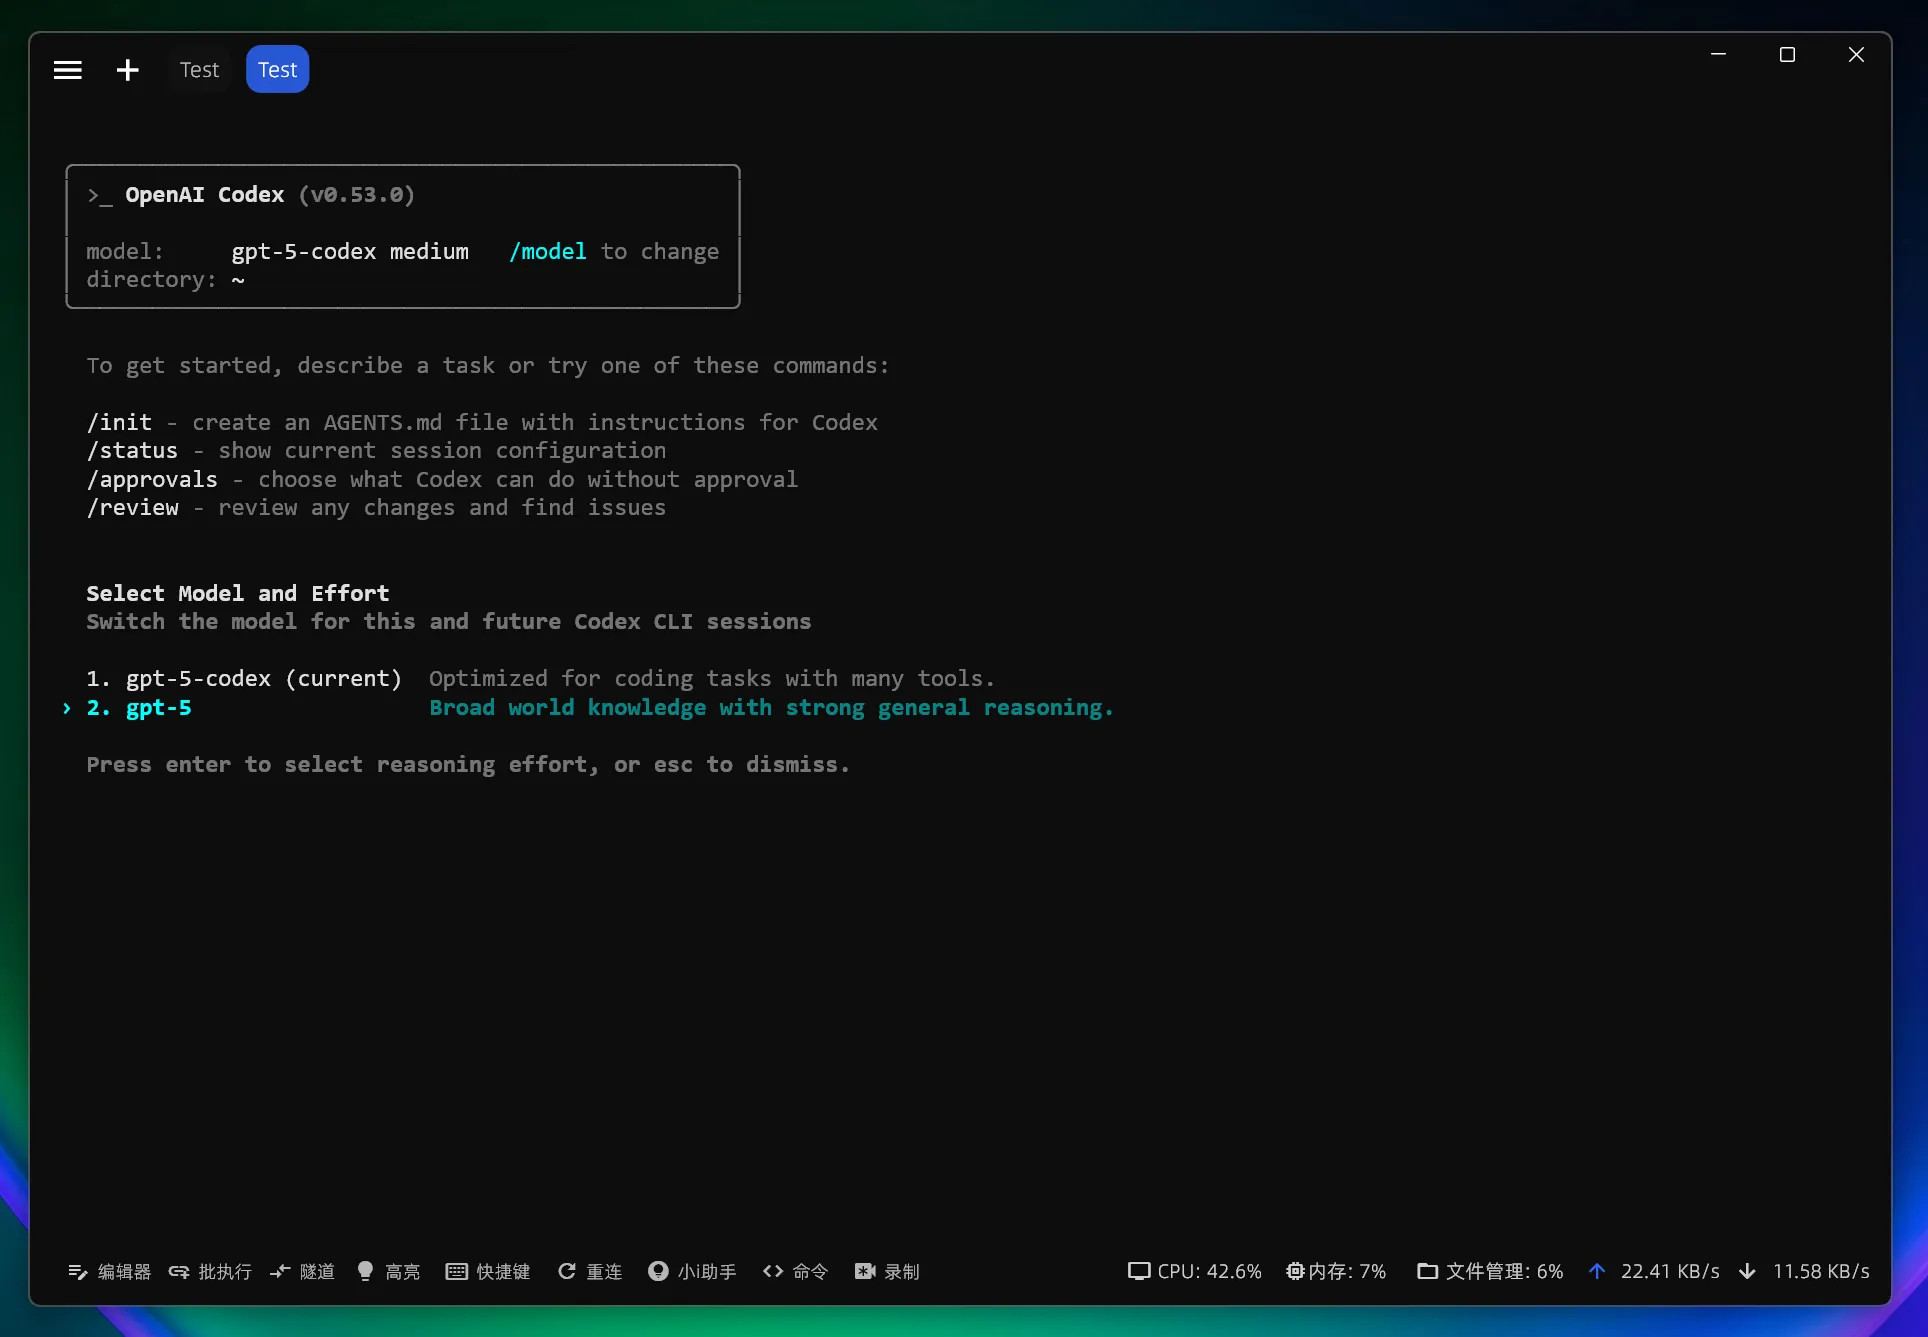
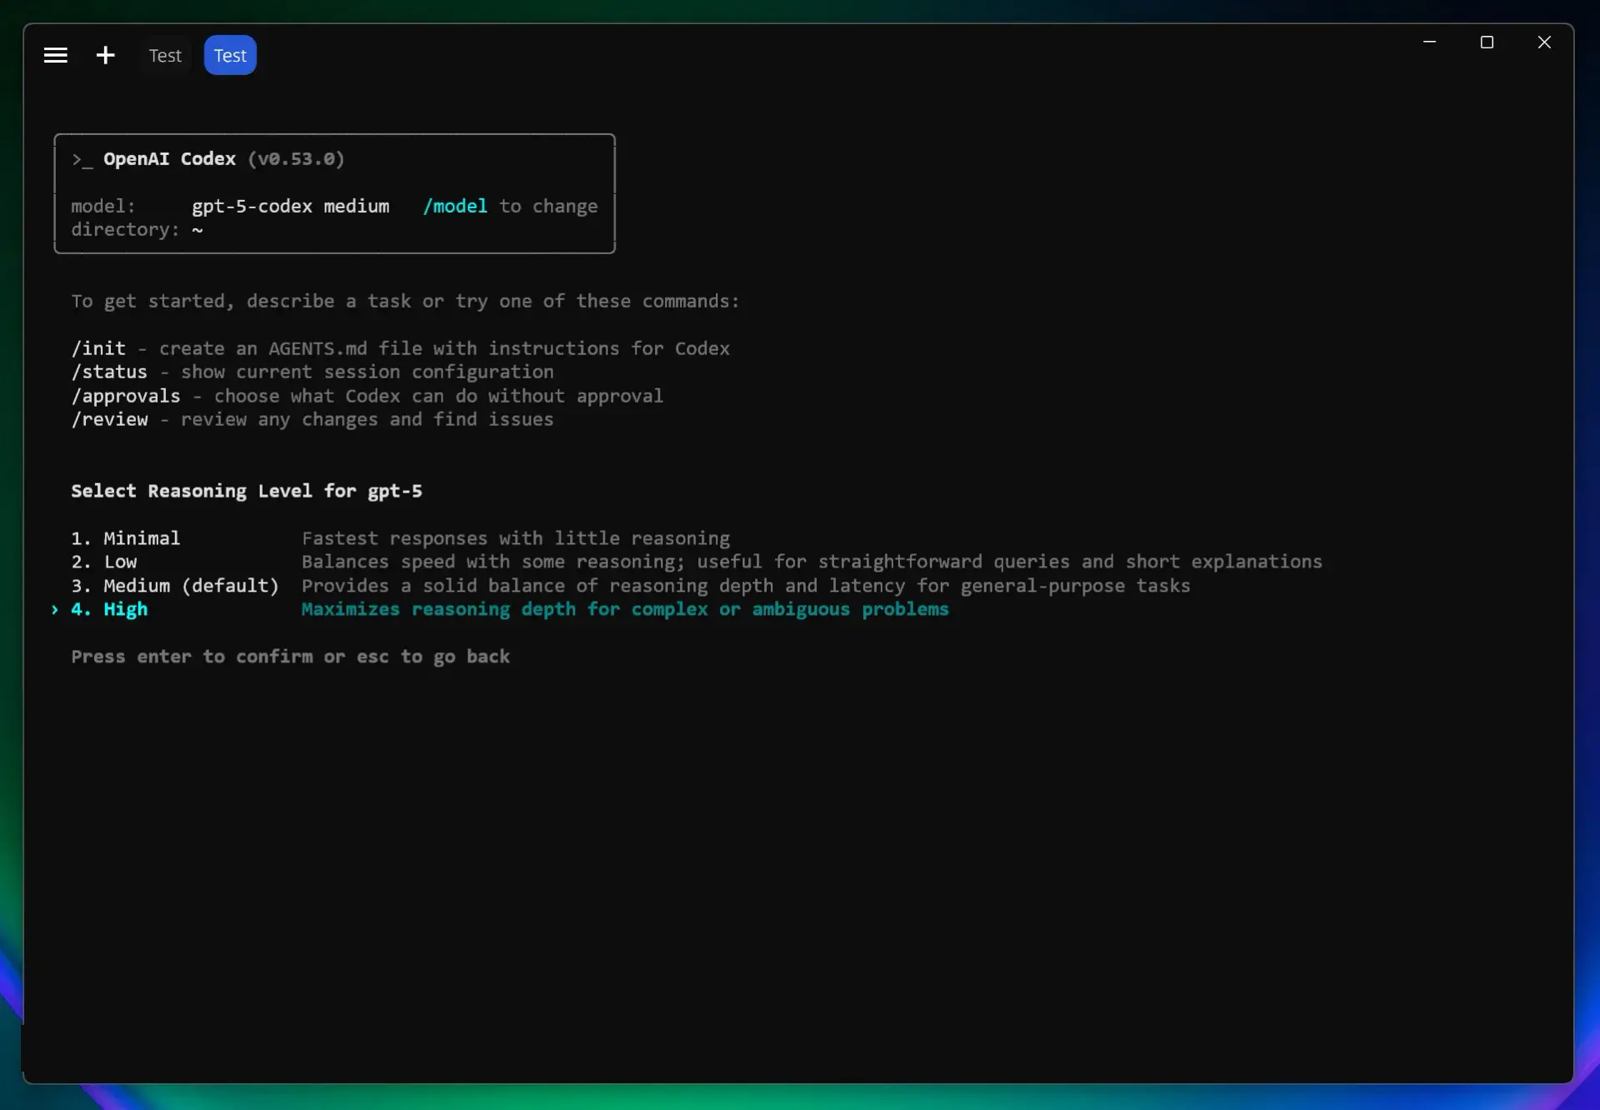
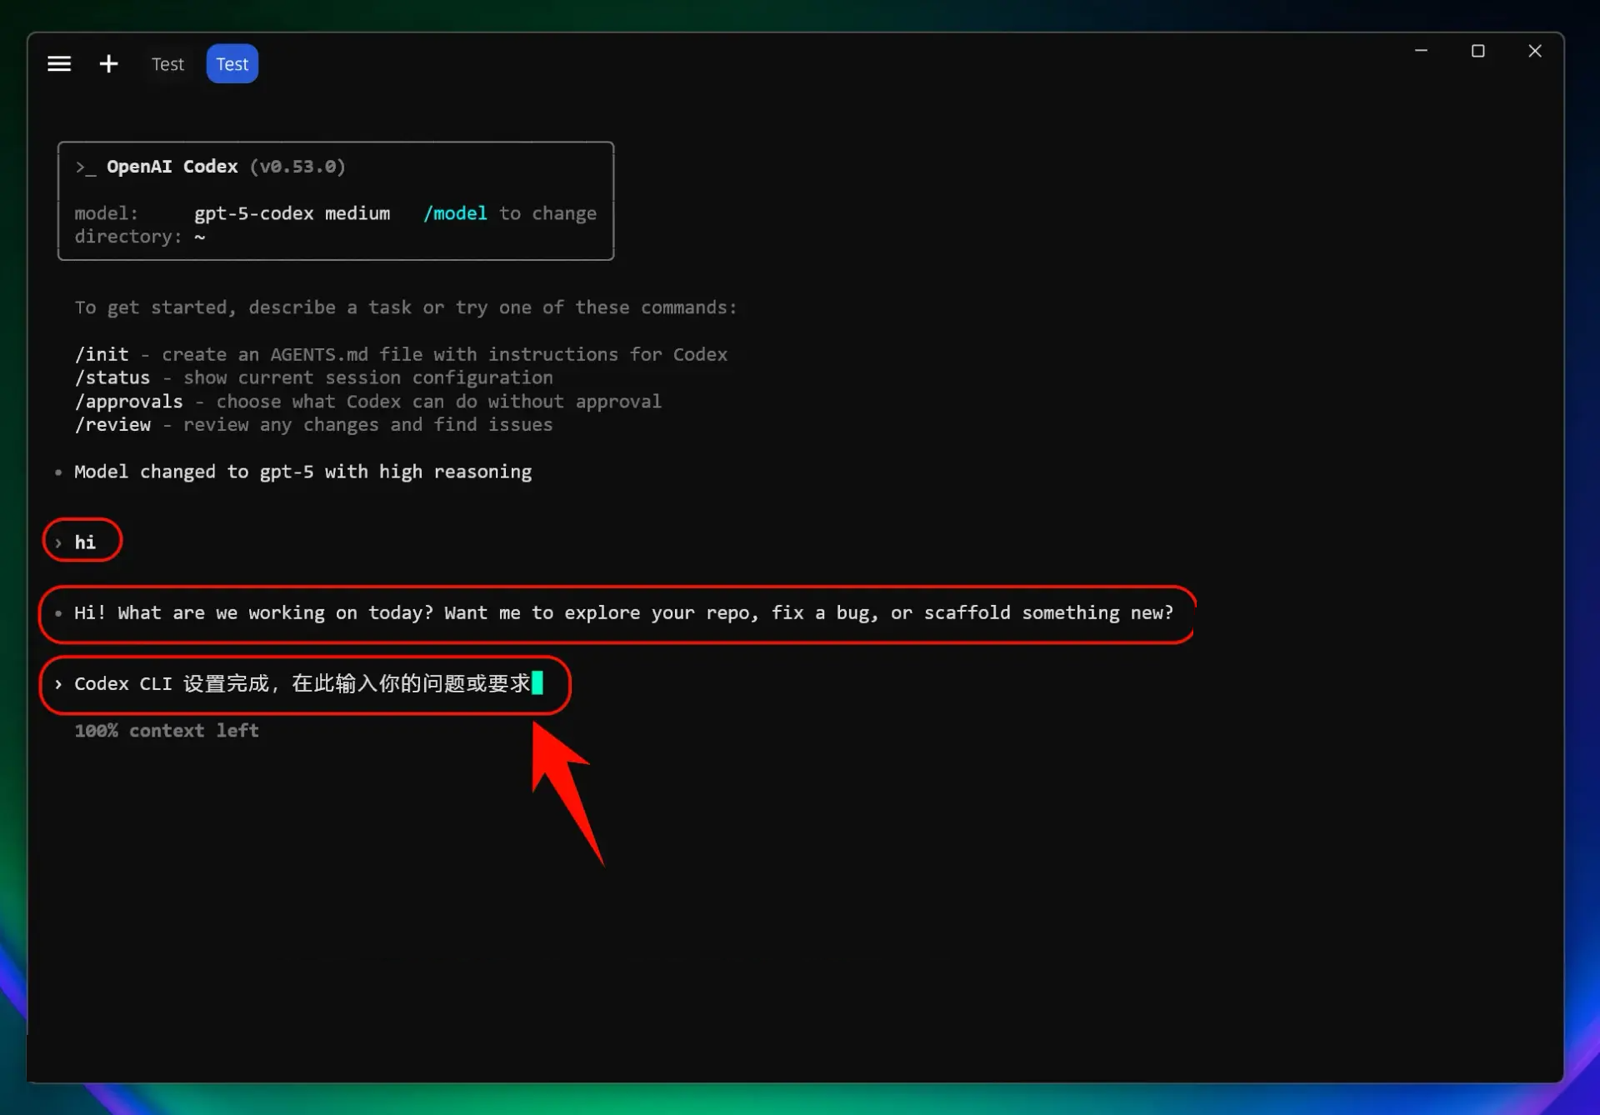
Note: After changing the API endpoint, all models (including the official preset models) will call your custom endpoint instead of using your official account quota.
5. Common Linux troubleshooting
Permission error during installation
Try the following solutions:
- Install with
sudo:sudo npm install -g @openai/codex - Or configure
npmto use a user directory:npm config set prefix ~/.npm-global - Then add it to PATH:
export PATH=~/.npm-global/bin:$PATH
Missing dependency libraries
Some Linux distributions require additional dependencies:
# Ubuntu/Debian
sudo apt install build-essential

# CentOS/RHEL
sudo dnf groupinstall "Development Tools"